Sản phẩm


.svg)

.svg)

This registrar doesn’t offer email forwarding service.
To get started setting up your store on your own domain using our platform, visit our website, www.gearlaunch.com/platform and click on “JOIN US TODAY.”

Bấm vào nút "LOG IN". Sử dụng địa chỉ và mật khẩu Gmail của bạn để đăng nhập.

Điền vào "Biểu Mẫu Đăng Ký Người Bán GearLaunch" và nhấn "Submit".

Chấp nhận Thỏa Thuận Người Bán GearLaunch.
Kéo xuống cuối trang; điền tên nhà cung cấp tên miền và tên miền của bạn, sau đó nhấn nút "Submit".

Thường sẽ mất chưa tới 24 giờ để cửa hàng của bạn được phê duyệt. Khi đó, bạn sẽ được thông báo qua email.

Sau khi cửa hàng của bạn được phê duyệt, bạn có thể đăng nhập bằng tài khoản GearLaunch của mình. Tại trang Dashboard, hãy nhấn vào thanh màu xanh lá với nội dung: "This GearLaunch site is not launched yet! Click here to see your DNS settings page".

Tiếp theo, nhấp vào nút "Check DNS records".

Sao chép các nội dung tại đây để cập nhật nhà cung cấp tên miền của bạn với các bản ghi và giá trị DNS này.

Truy cập trang web cung cấp tên miền và đăng nhập vào tài khoản của bạn.
Cập nhật bản ghi DNS của bạn với thông tin bạn có được từ GearLaunch.
Once you’re set up with your GearLaunch account, log into your Godaddy.com account. Go to your profile on the top right corner and click on “My Products” from the drop-down menu.

Scroll down to the “Domains” section, look for the domain you want to set up and click on the DNS button.

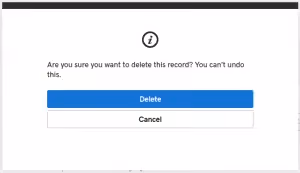
Get rid of all existing DNS records that can be deleted.

Confirm the deletion in the pop-up window by clicking the “Delete” button. That’s the easiest way to make sure you correctly set up your DNS records without any other records interfering.
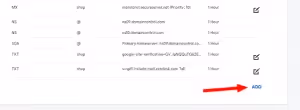
Next, set up your own DNS records by clicking the “ADD” link.
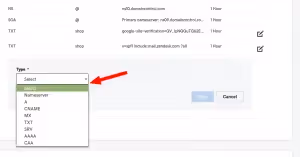
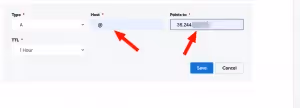
Click on the “Select” drop-down list to add the corresponding records. Then fill the fields with the records provided in the GearLaunch admin setup page and click on “Save”.
Once you’ve configured all your DNS records in your GoDaddy.com account, you’ll need to upgrade to use Office365 to set up your email forwarding. Doing so allows your customers to reach our customer service team directly.
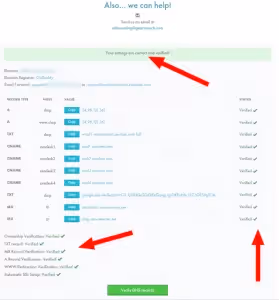
The last step in your Godaddy.com account is waiting for the registrar to populate the DNS records update. Once you click on “Verify DNS records” and each setting’s status is “verified”, it means your store is live.
Once the email forwarding is set up and confirmed, your store will begin the SSL certificate signing process, which could take up to 24 hours to be completed. It’s worth the wait for your store to be live and secure.
Video instruction:


.svg)
.svg)
.svg)


