Sản phẩm


.svg)

.svg)

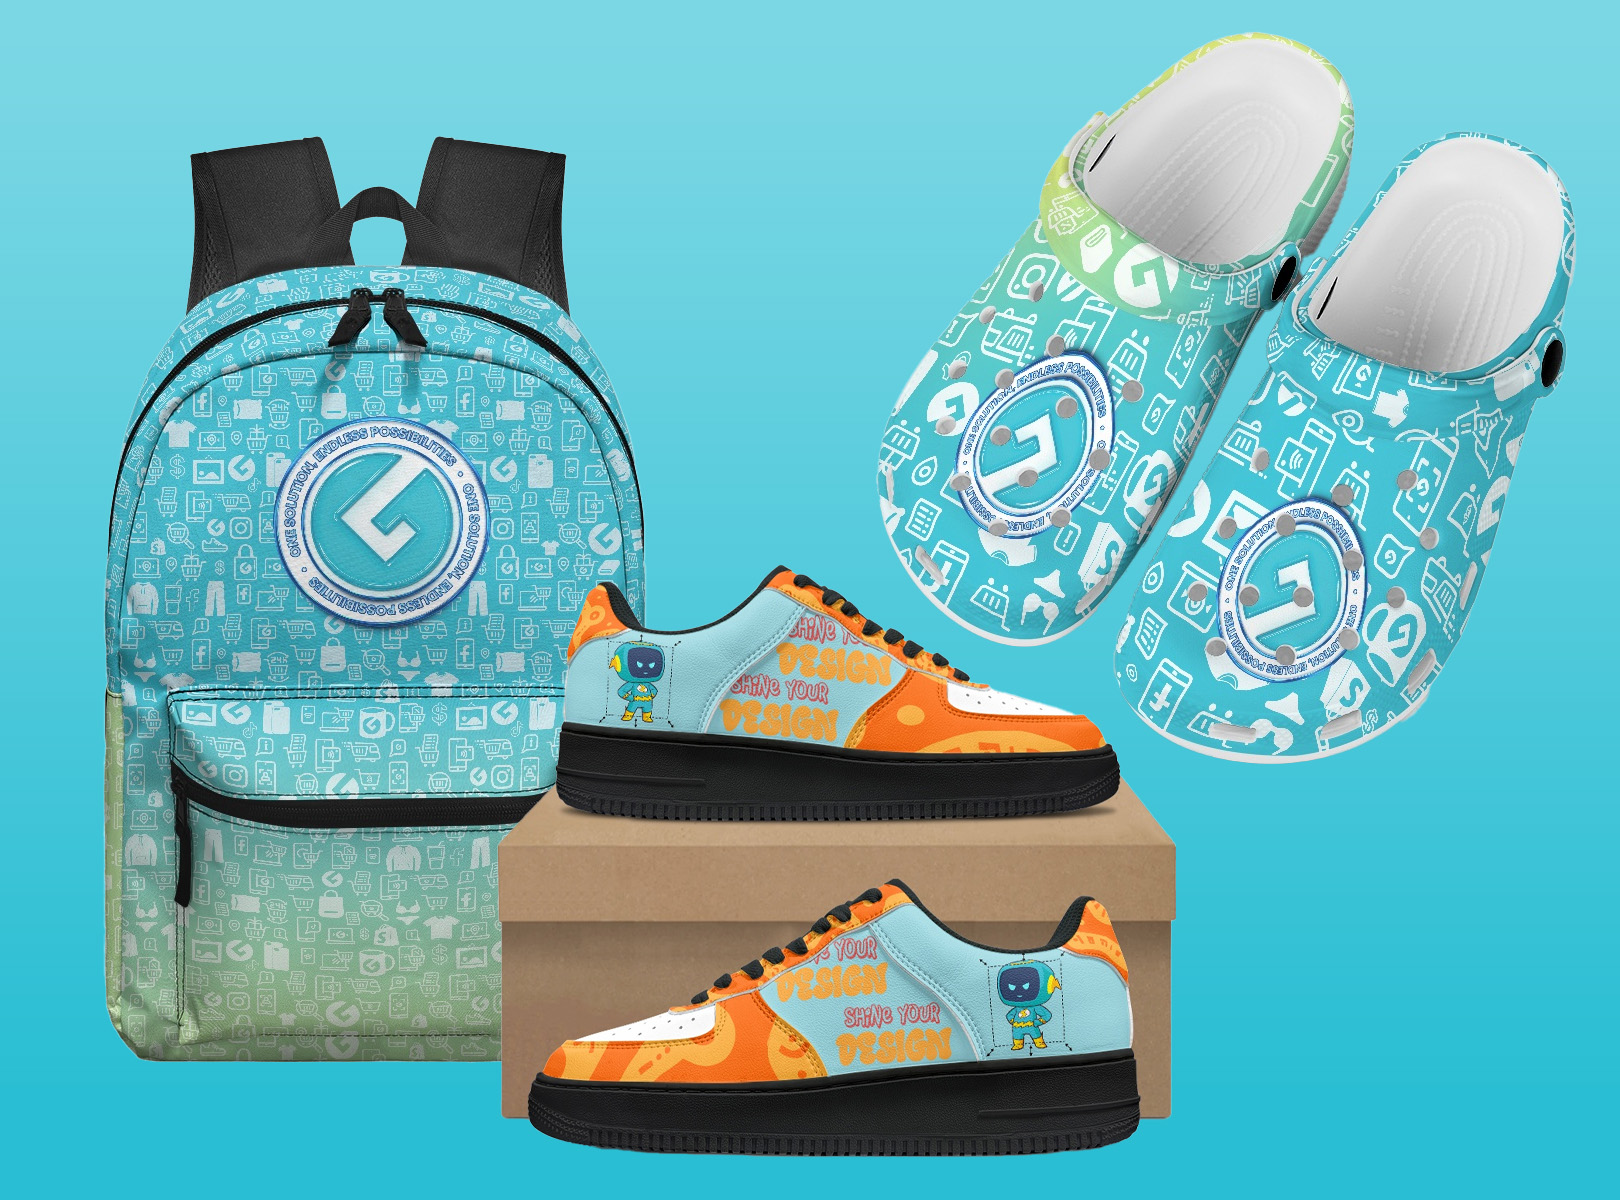
Unlock 6,000+ products powered by premium decoration methods like Liquid 3D, UV DTF, sublimation, embroidery, and engraving giving you more ways than ever to create and sell standout designs.
Here is exactly how to set up your new campaigns using our top-promoted techniques: Embroidery, Liquid 3D, and Laser Engraving.
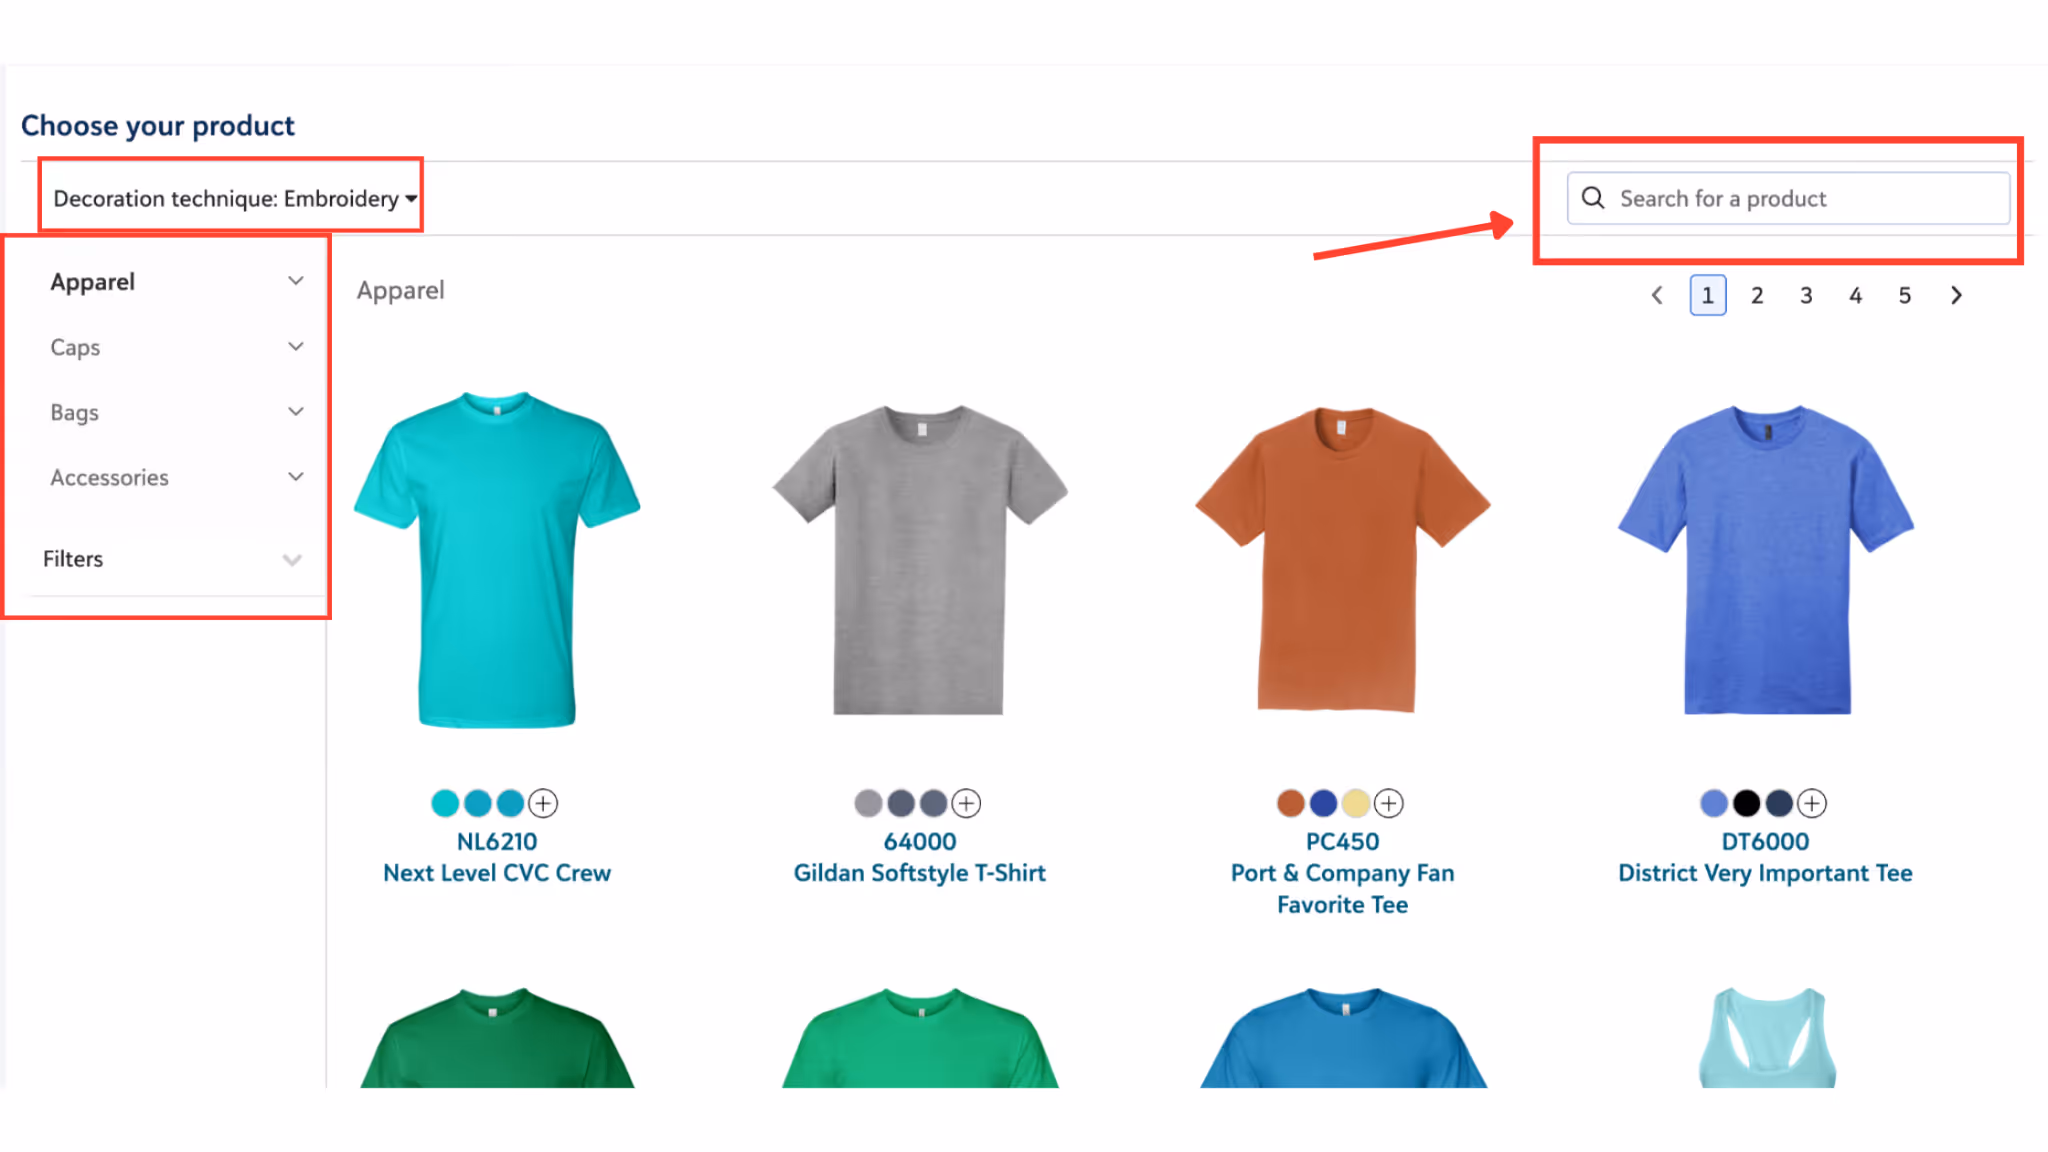
Go to Campaigns >> Create campaign >> Designer >> Add Products, to access the new catalog today. When creating a new campaign, select the "Other Decoration Methods" option.
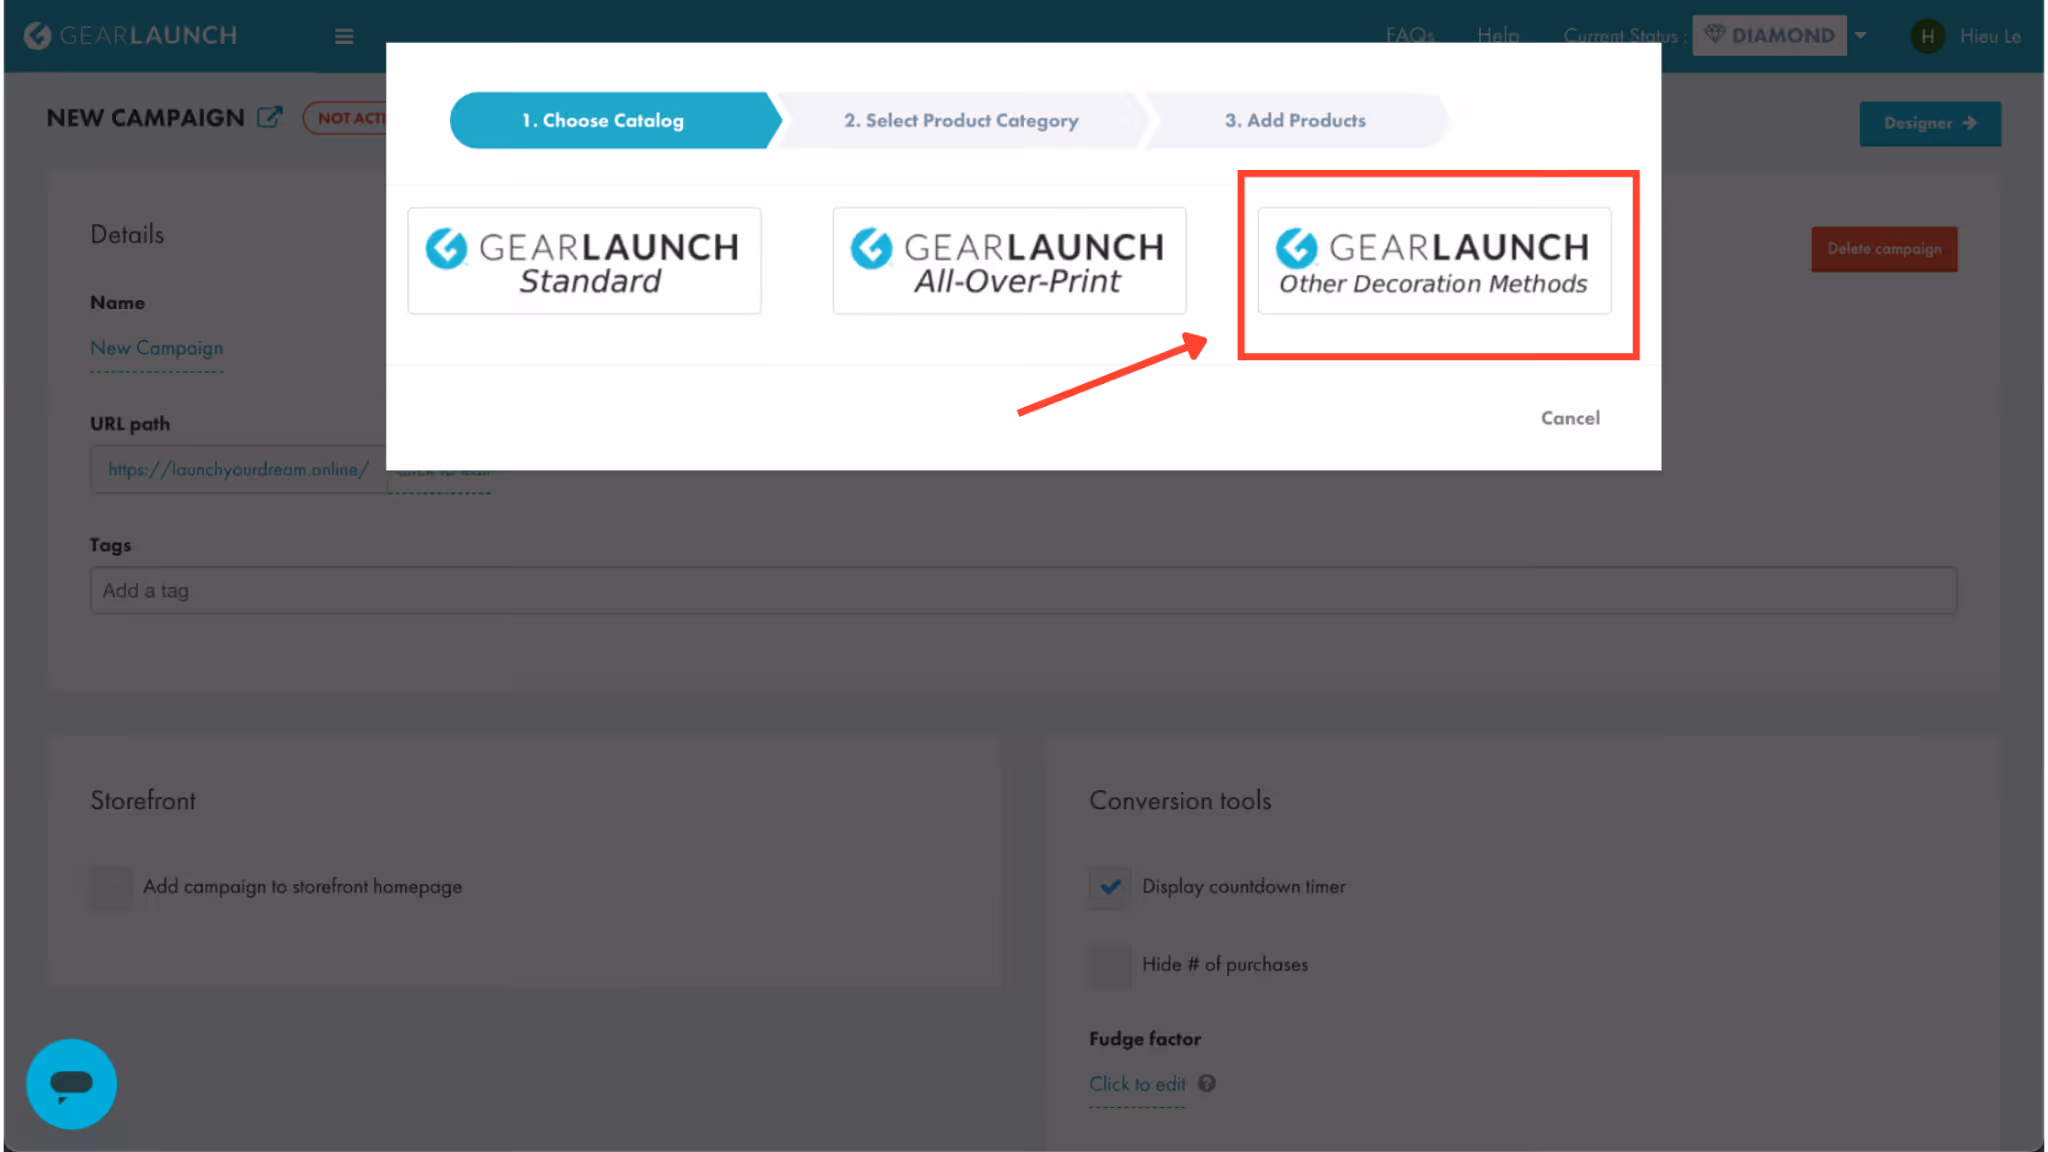
Once there, you will be prompted to choose your preferred decoration technique.

💡 Campaign Setup Pro Tips:
⚠️ Always Remember to Save: The new dashboard requires you to explicitly save your progress at multiple stages. Whether you are confirming thread colors, locking in 3D effects, or finishing a product mockup, always make sure to click the Save buttons before moving on!
Step 1: Once you select Embroidery, the system will automatically filter to show products that match this method. You can browse these compatible products in the left-side menu.
Step 2 (Upload & Color Setup): To create an embroidery product, you must use a specific file format called .dst. You can create these files using software like FileStar, Ink/Stitch, Hatch Embroidery, or Wilcom EmbroideryStudio.
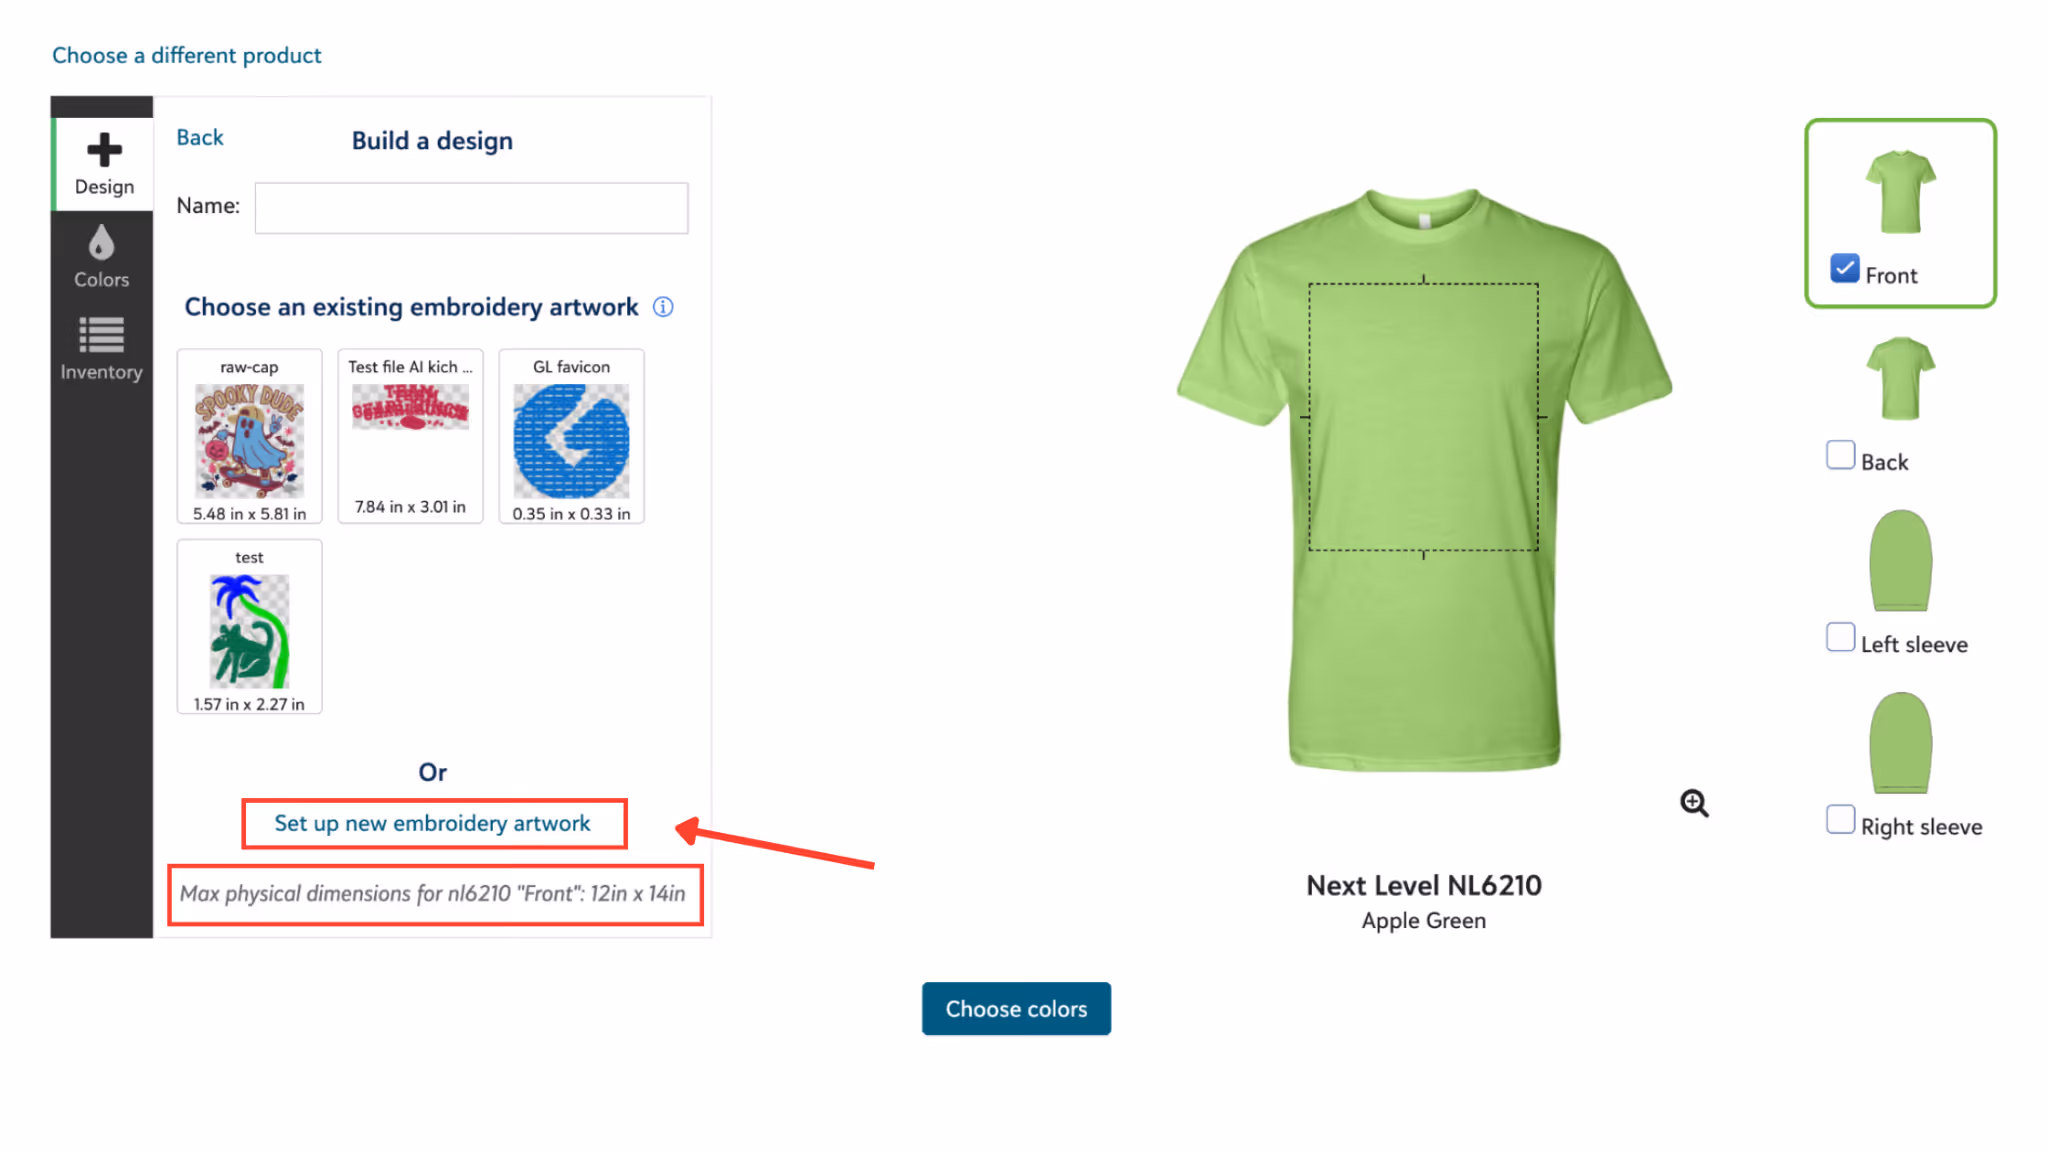
In the GearLaunch seller dashboard, click on “Set up new embroidery artwork” to upload your design.
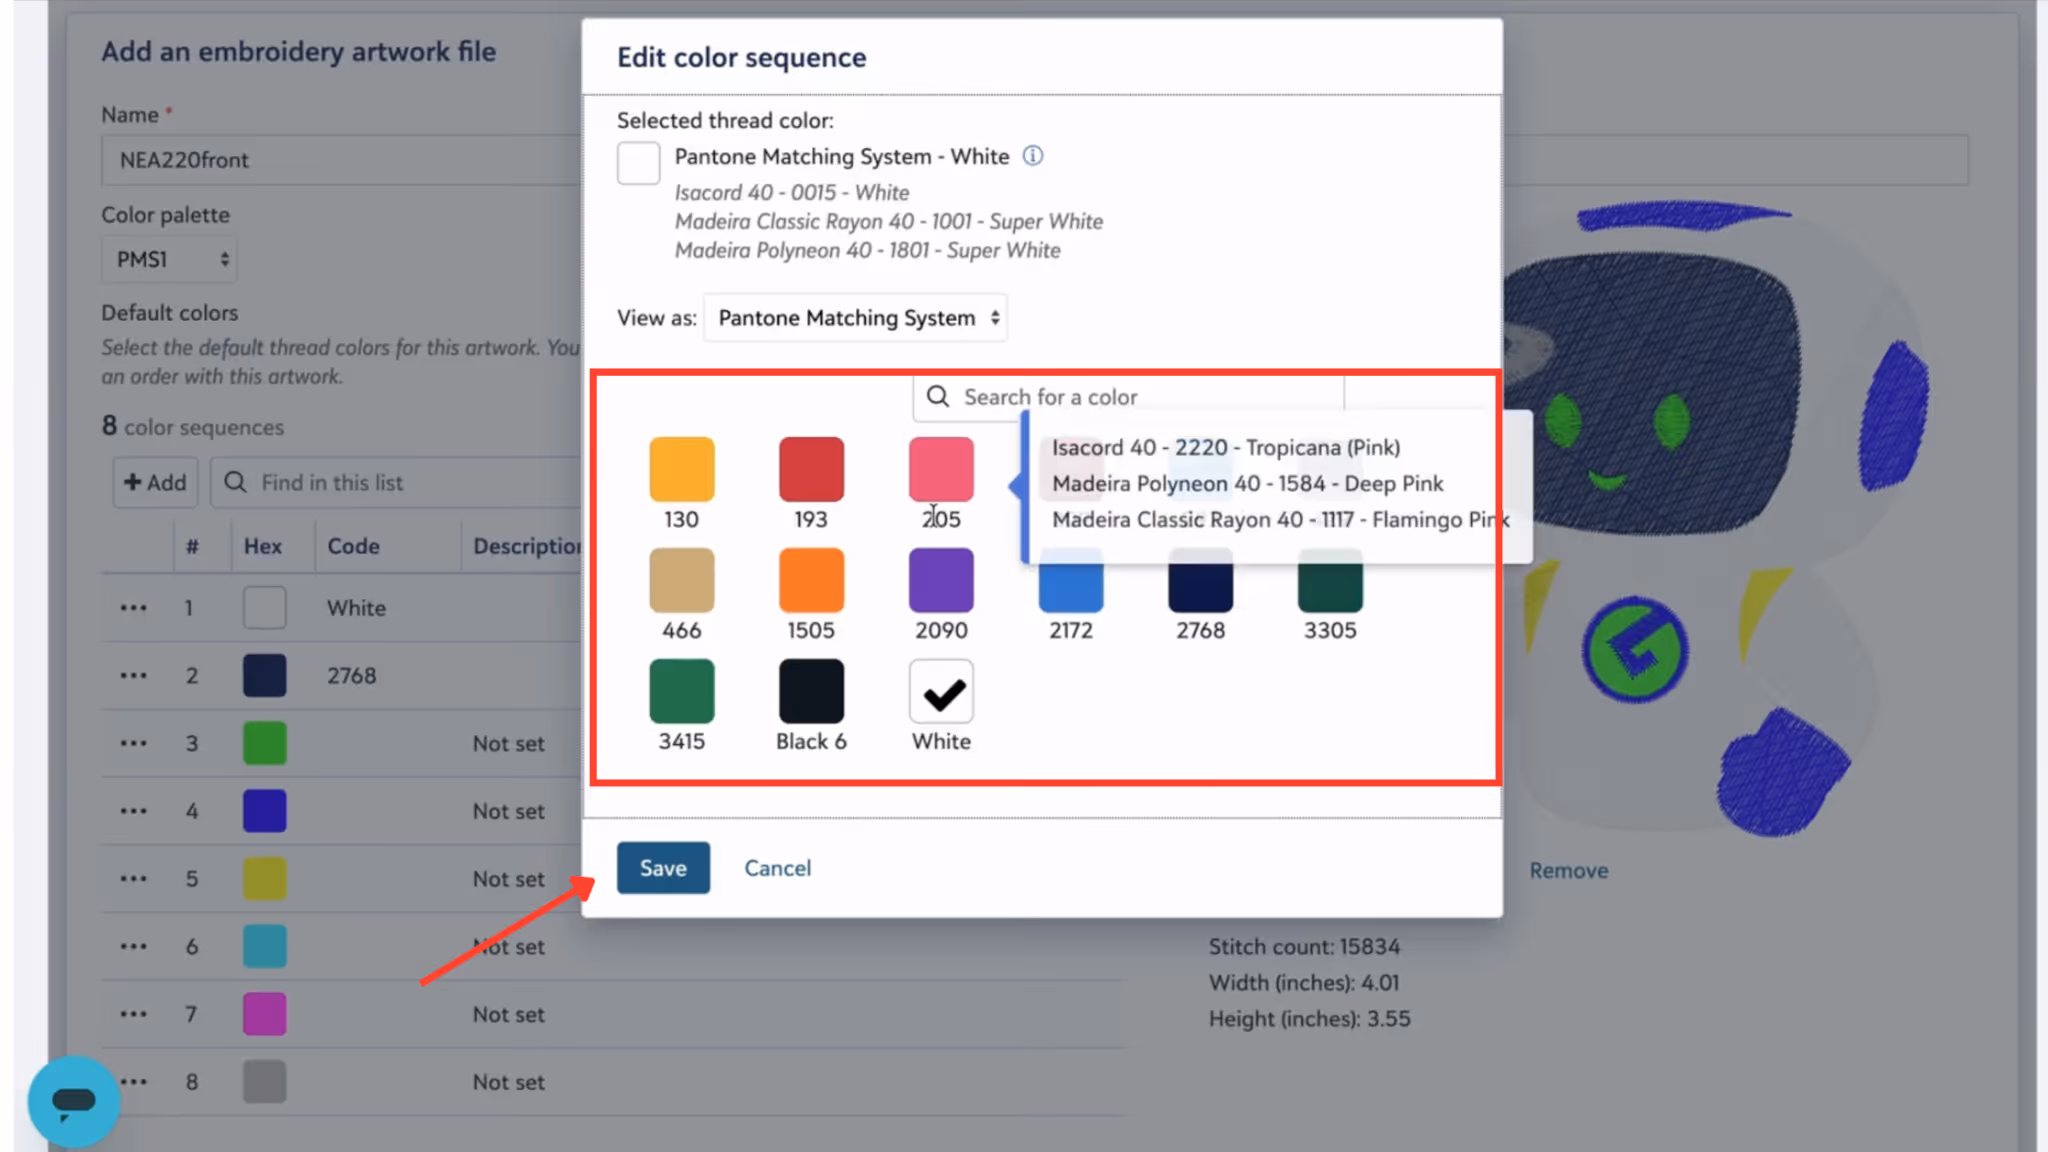
Enter a Name for your artwork file. Next, click on the color icons to open the "Edit color sequence" palette, select your preferred thread colors, and click Save. You can always go back and change these colors later to perfectly match the apparel!

Step 3 (CRUCIAL RULE - CHECK DIMENSIONS): You must check your design dimensions before setting them up because the new methods do not allow resizing on the dashboard. Typical sizes range from 3" (small badge) to 8" (medium badge) and 12" (full chest).
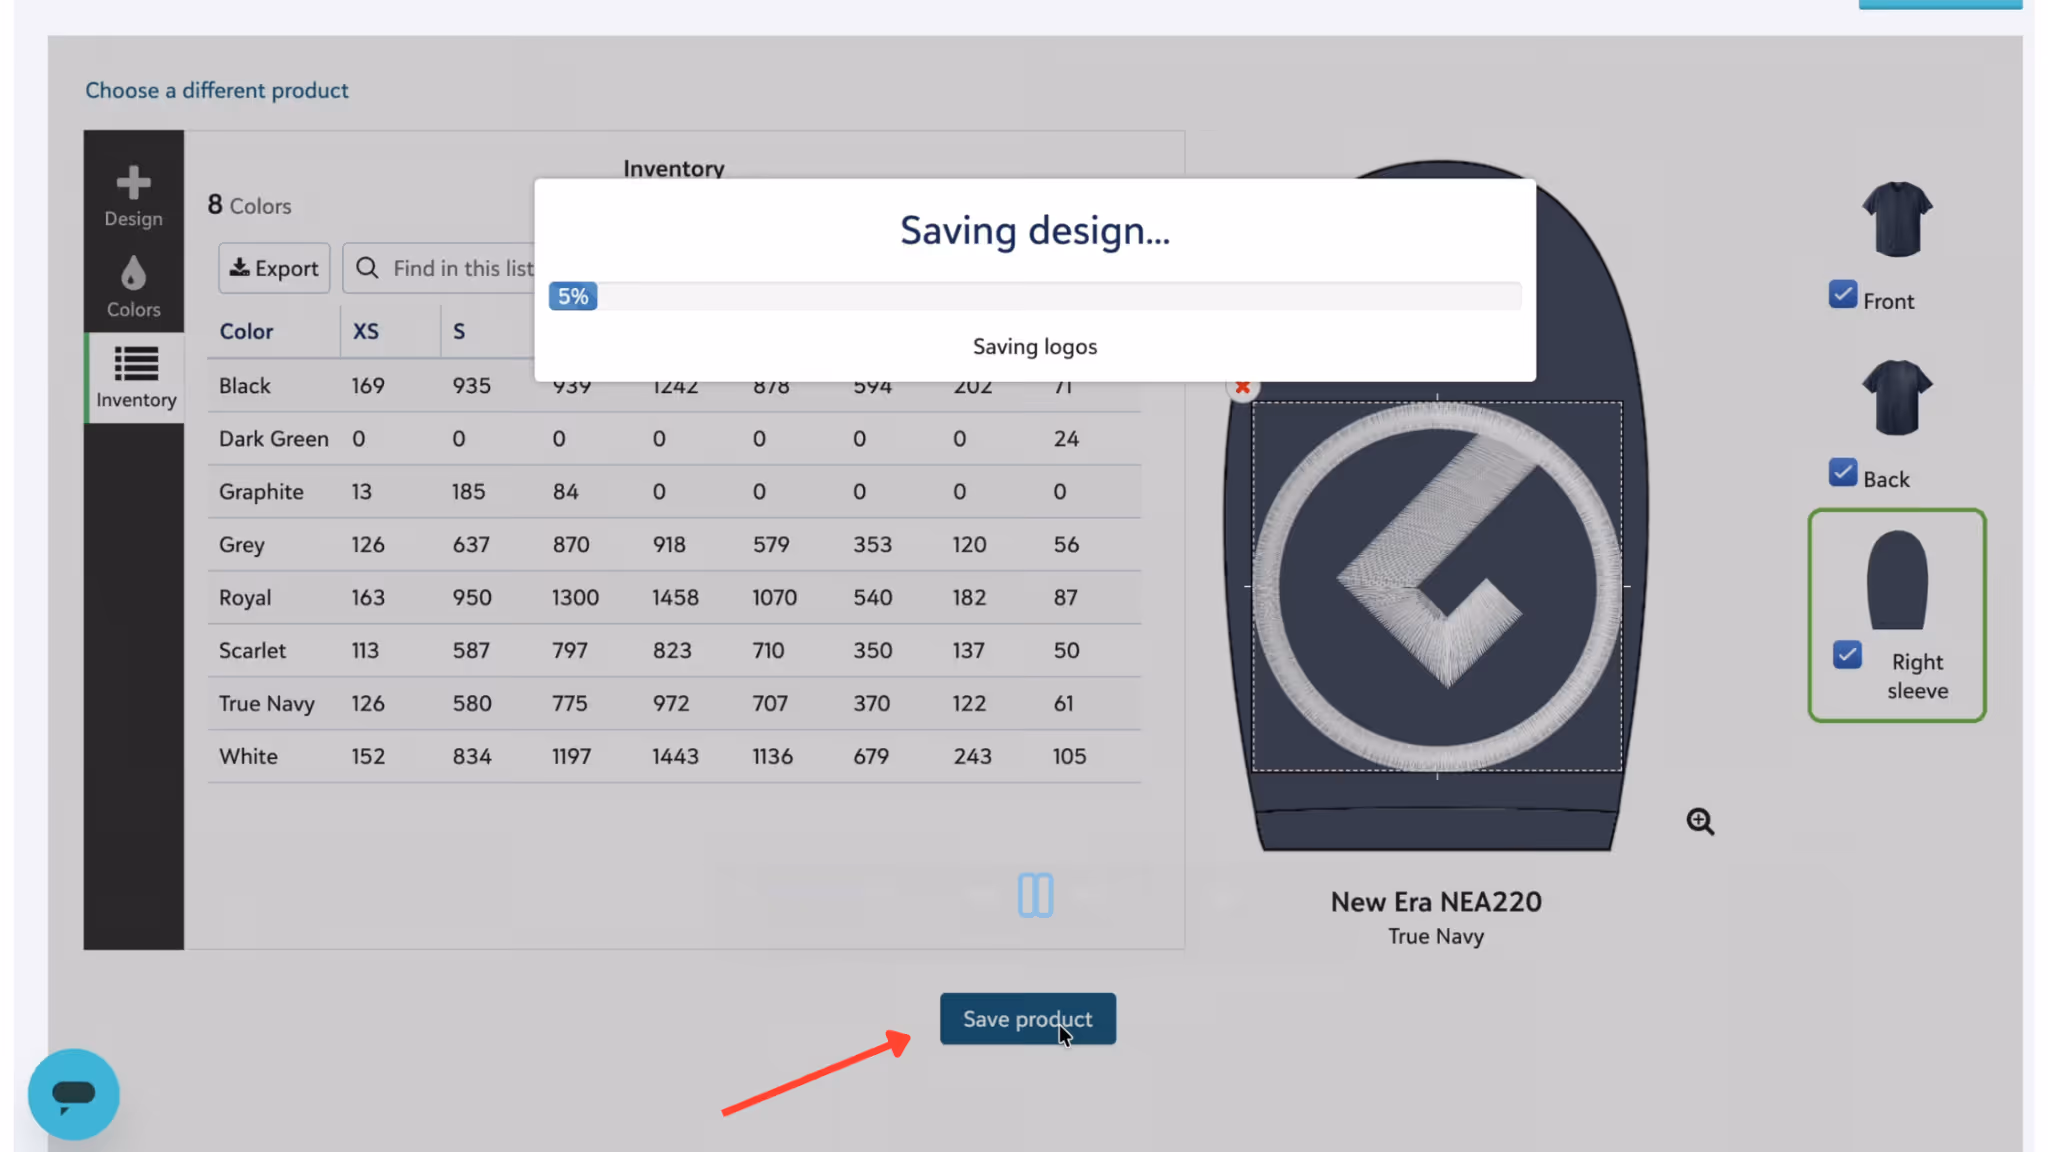
Step 4 (Save & Create): Once your design is perfectly placed on the product, click the Save product button at the bottom of the screen. A window will pop up asking you to choose your product name. Fill in the Product name and Design name, then click Create.

Design Freedom: Most of our new embroidery products have no limit on thread count. You can easily create designs using 10+ thread colors!
Liquid 3D gives your merchandise an incredible tactile feel, but requires specific design considerations.
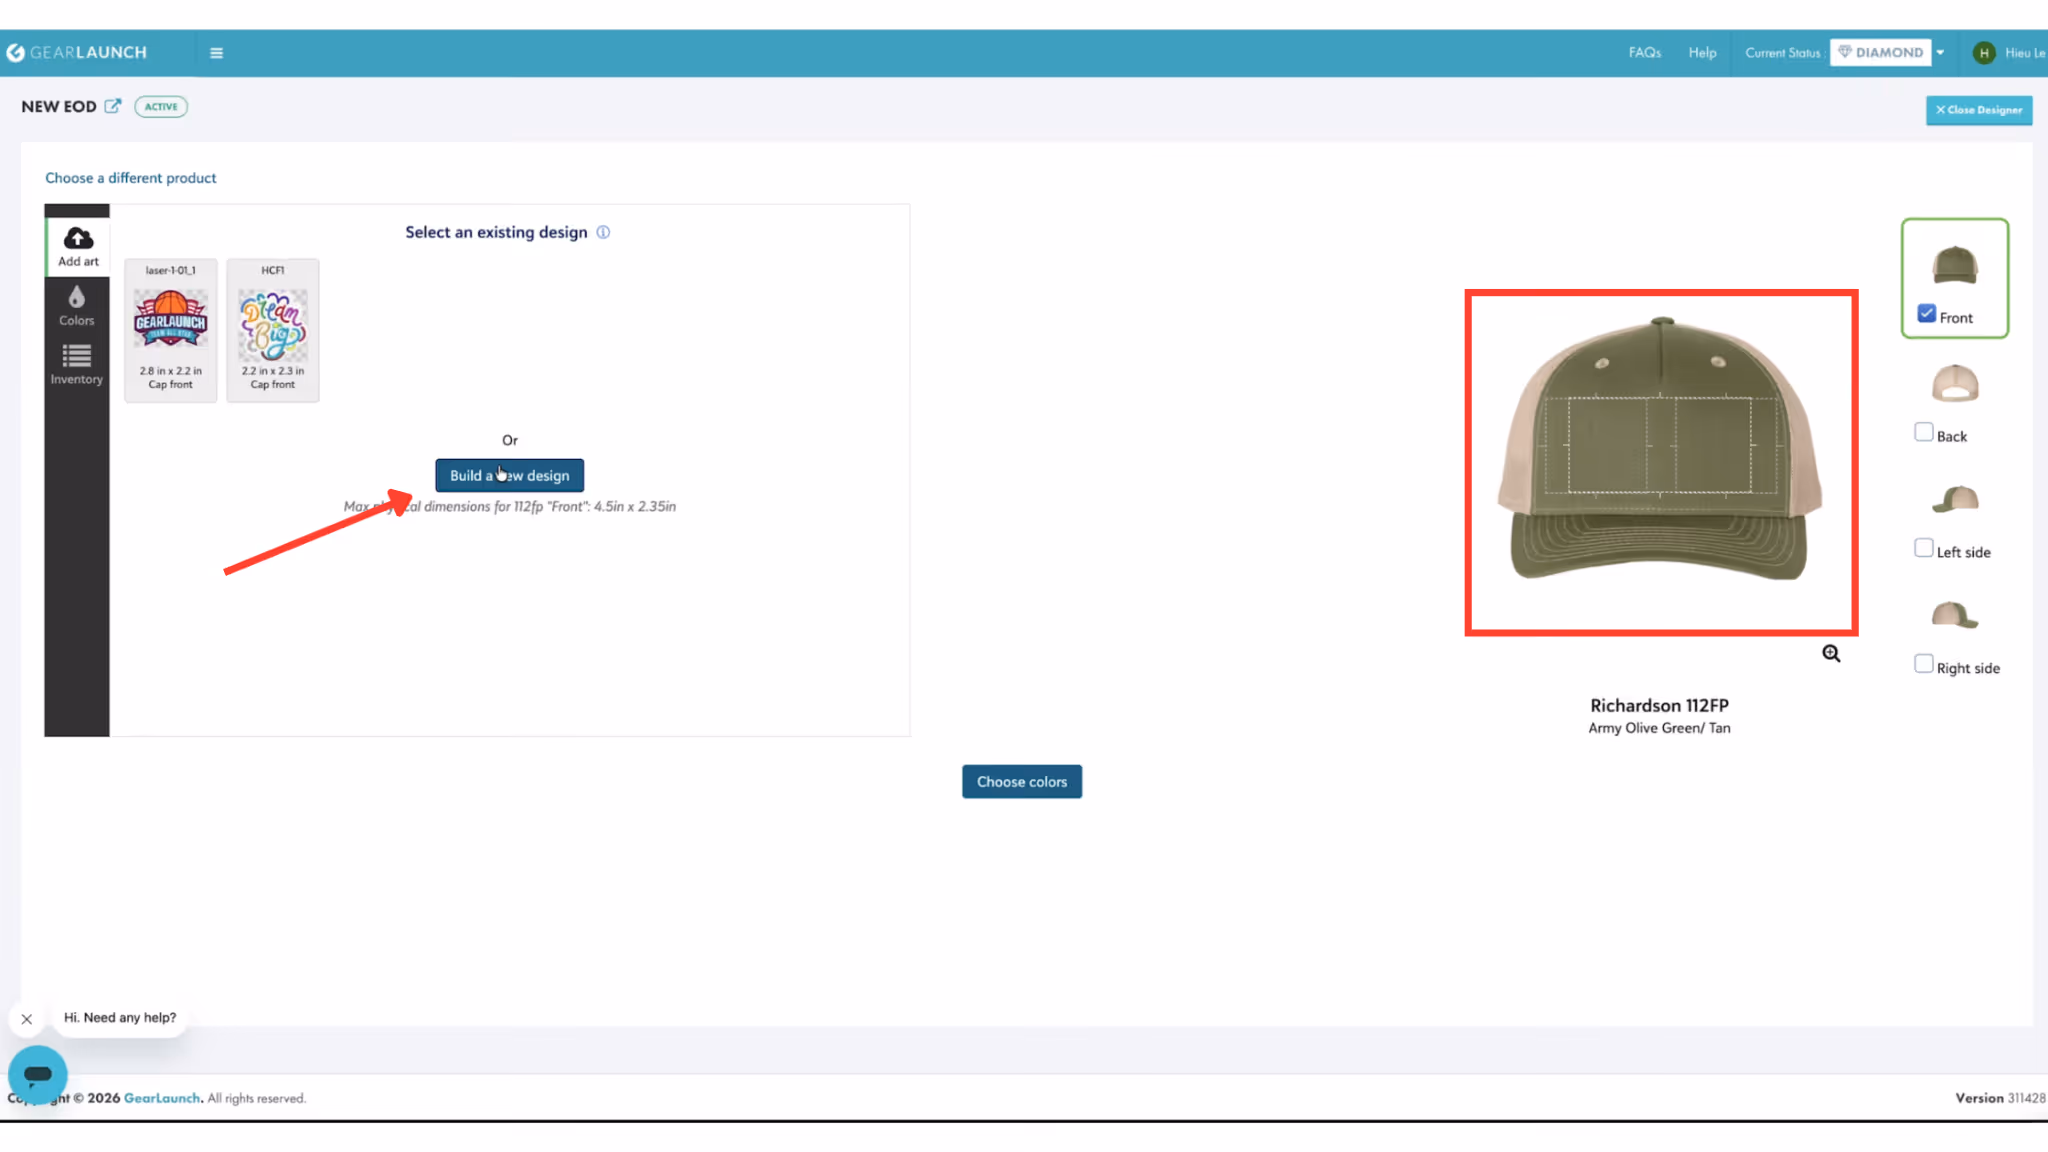
Step 1: Select a compatible product (like a cap) and click the "Build a new design" button. Be sure to check the allowable design area on the product.
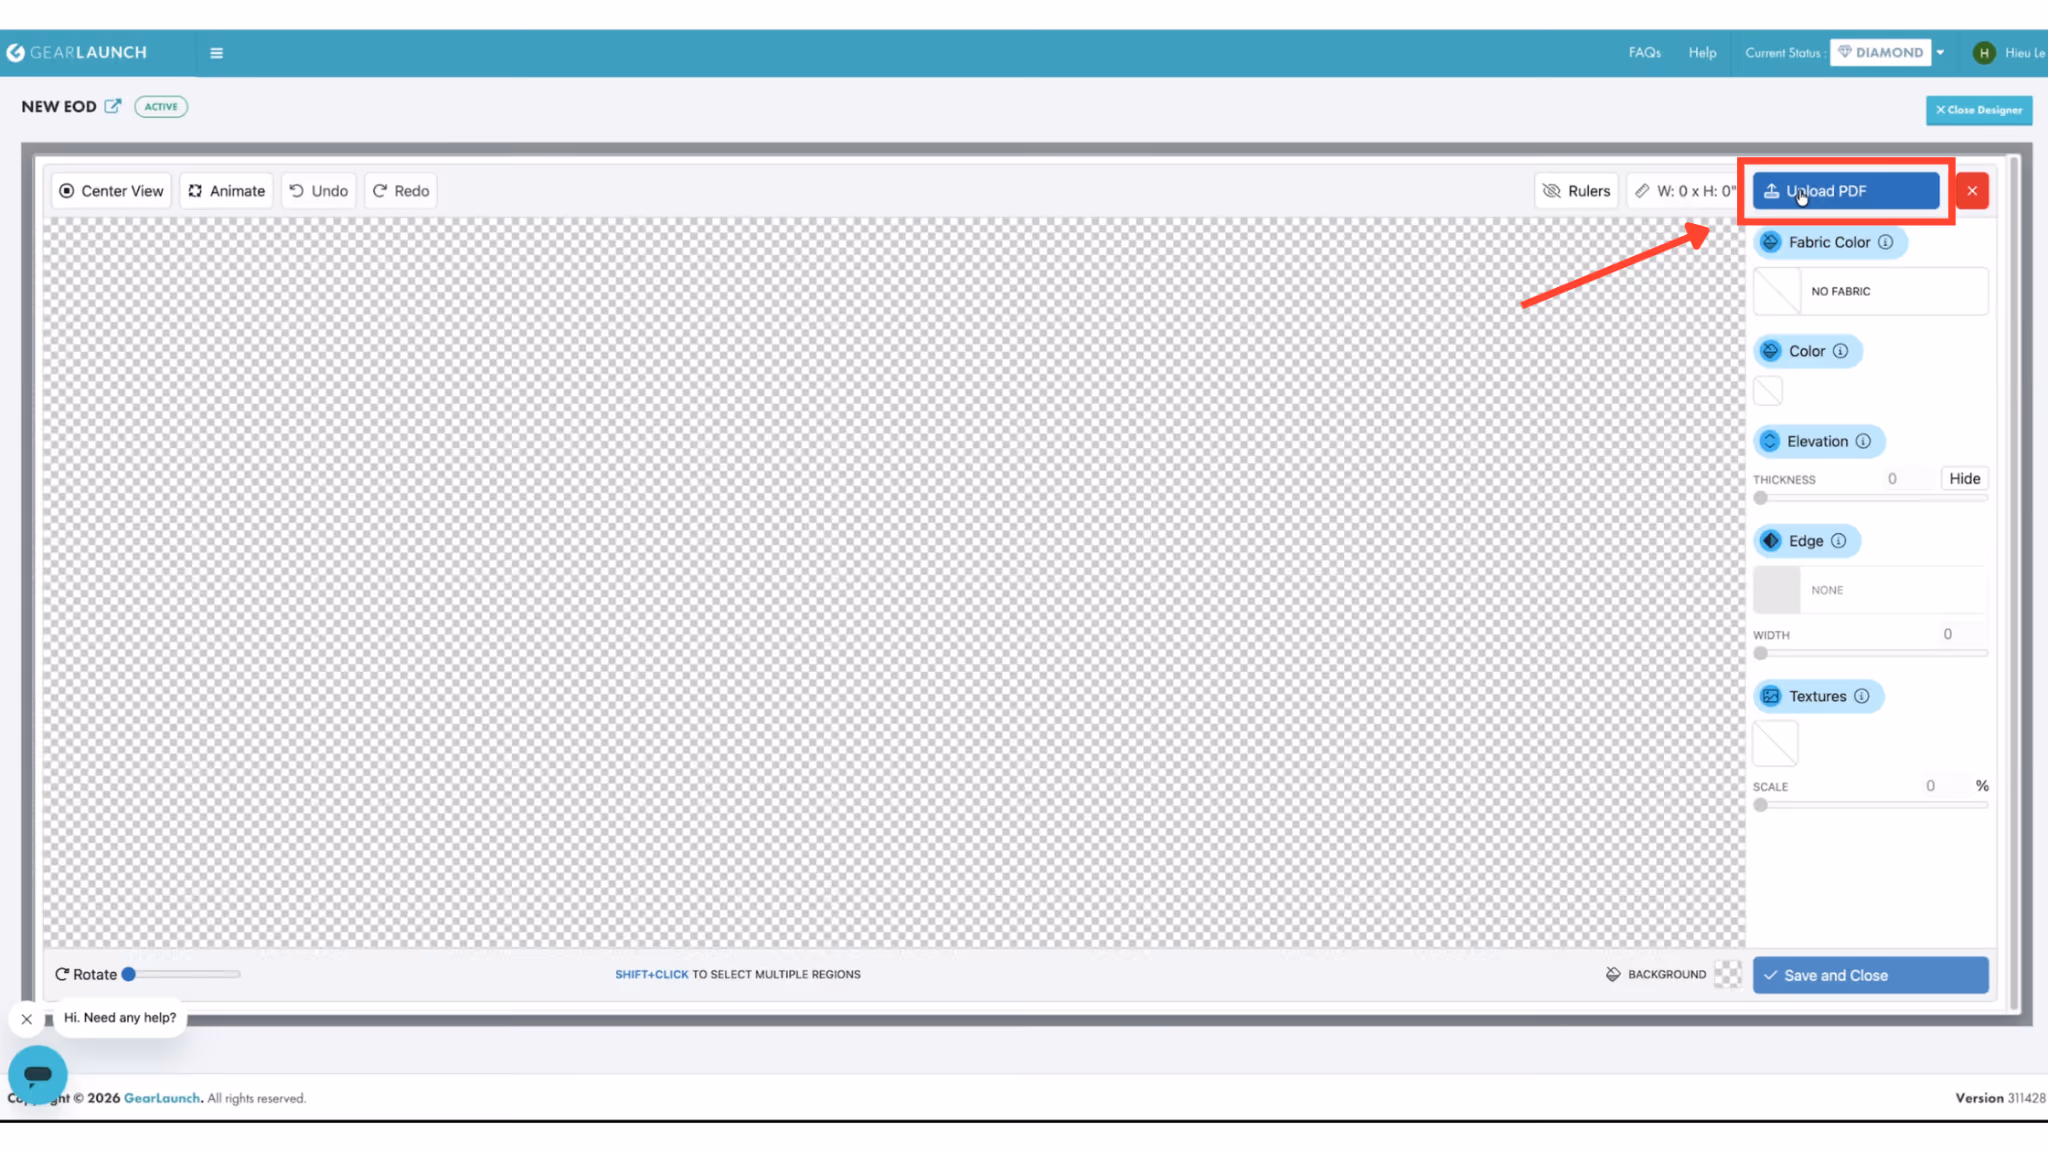
Step 2: Click "Upload PDF" in the top right corner to upload your clean PDF file.
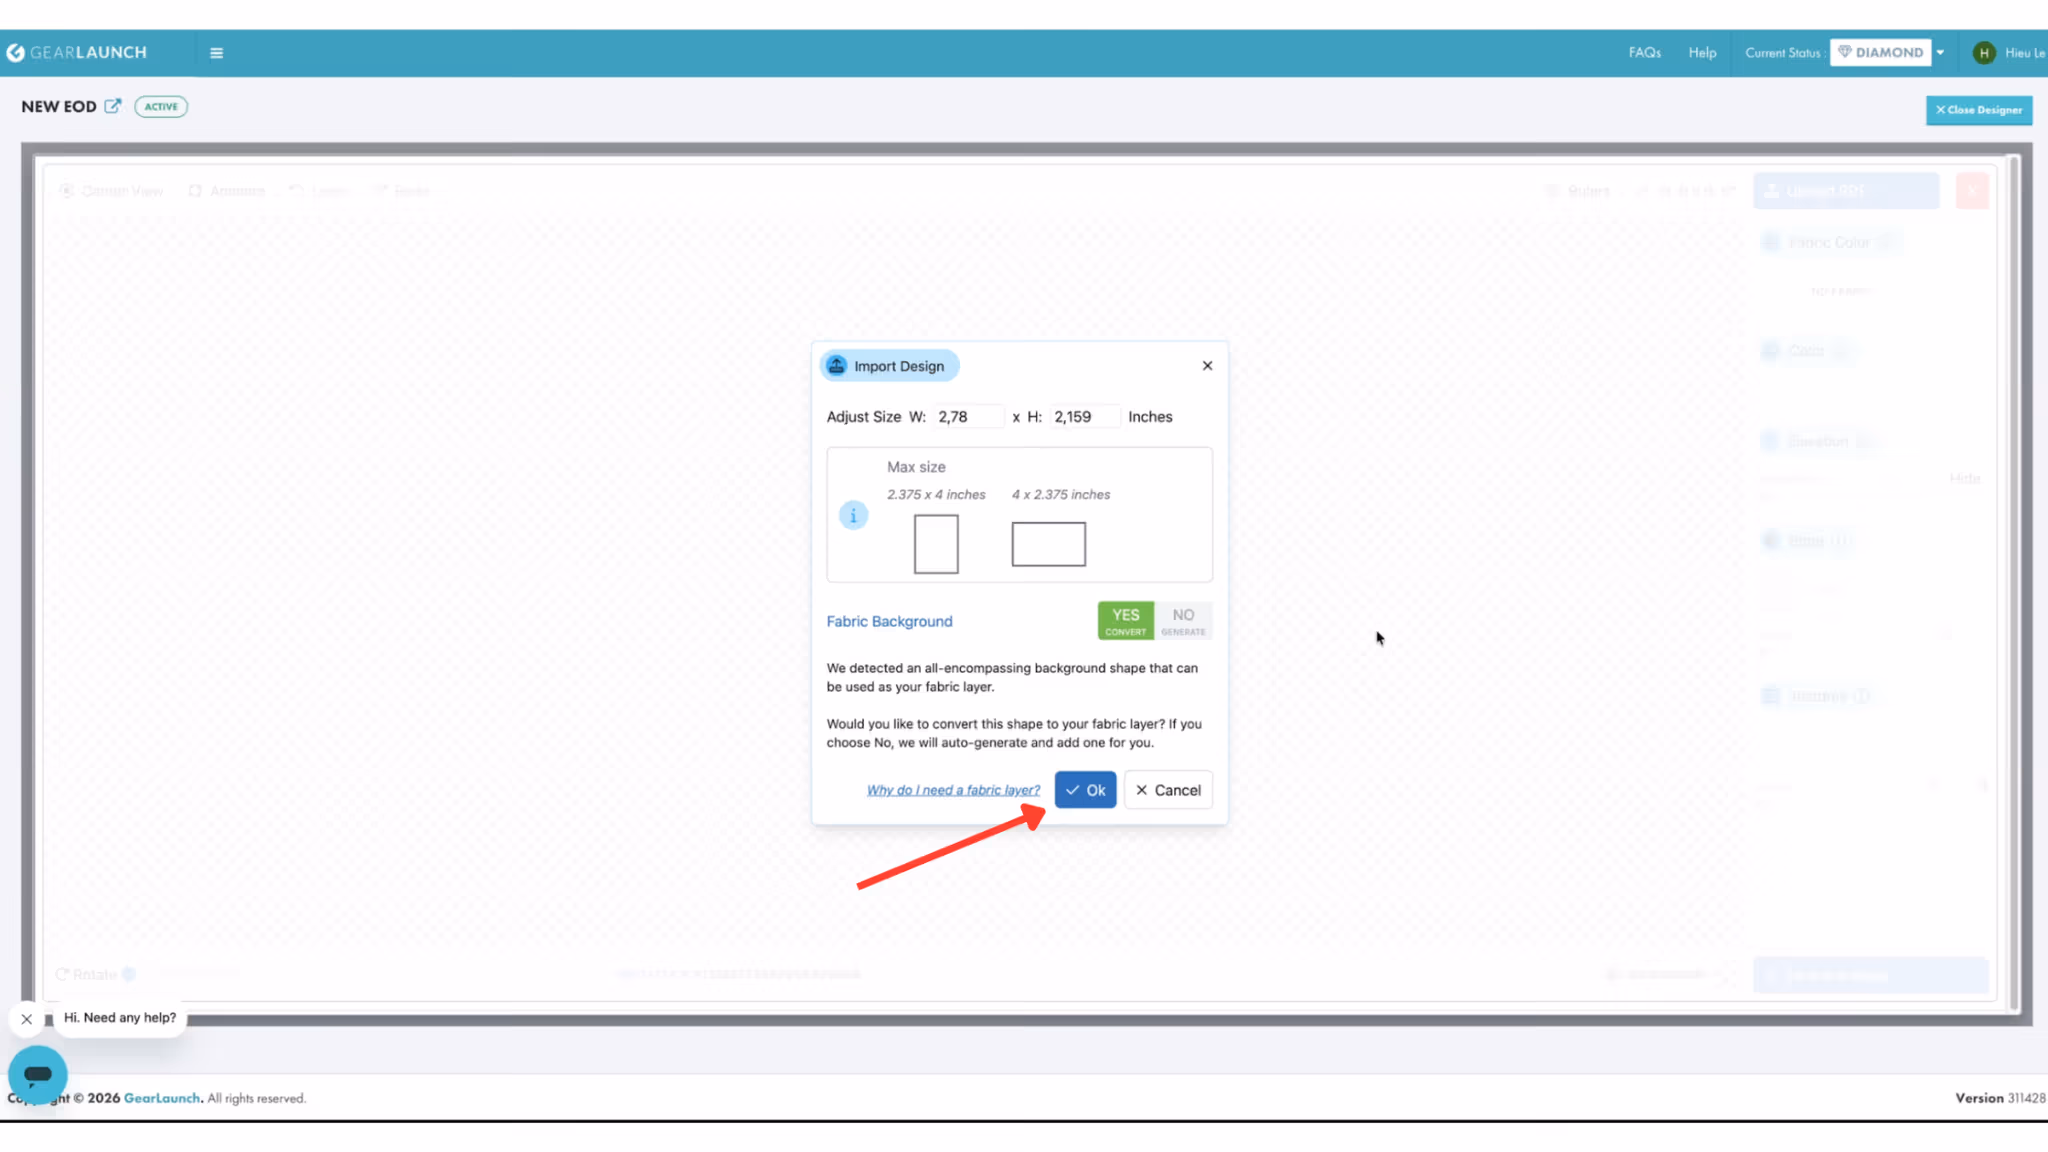
Step 3 (Size & Base Layer): The Import Design window will pop up.
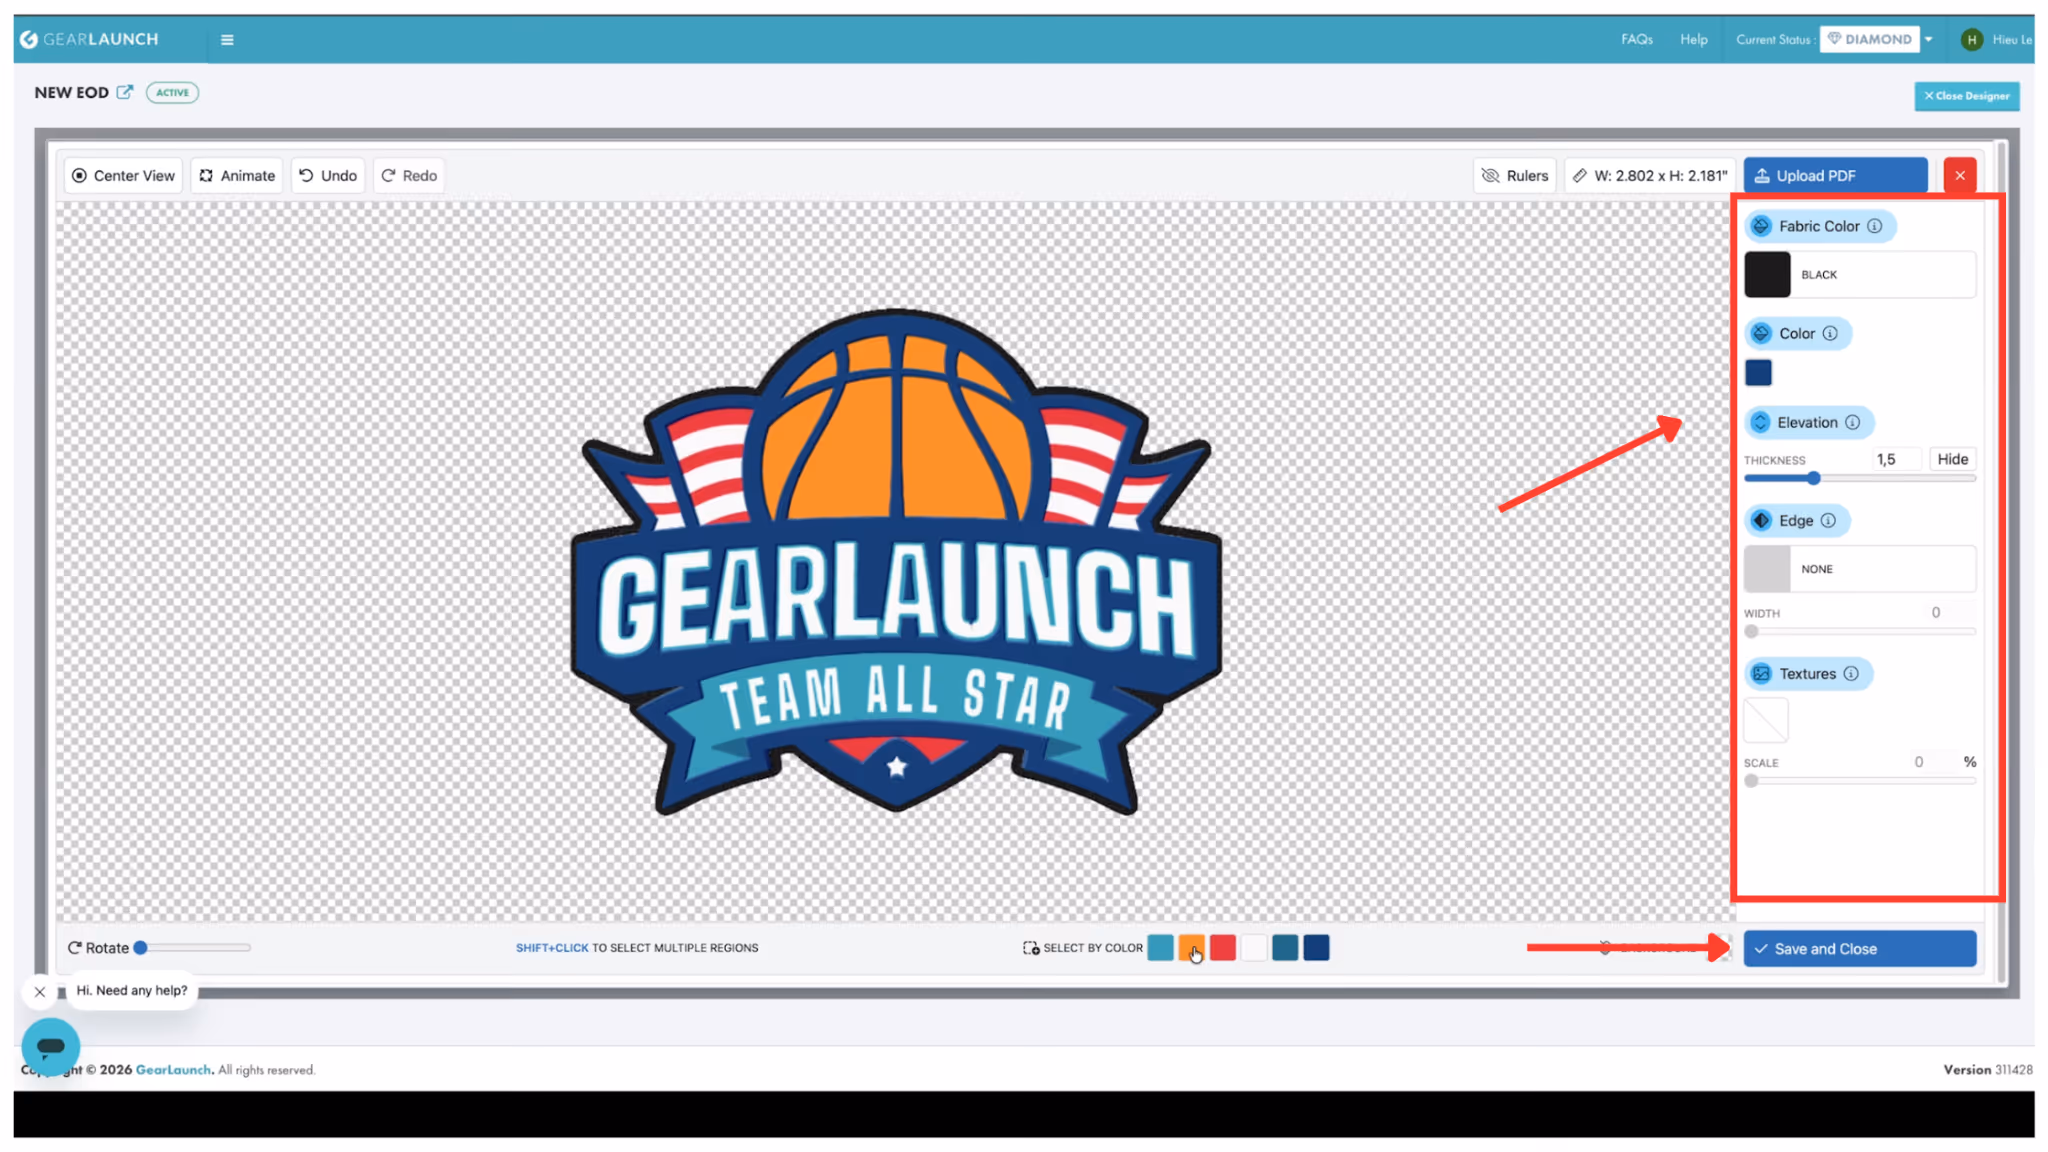
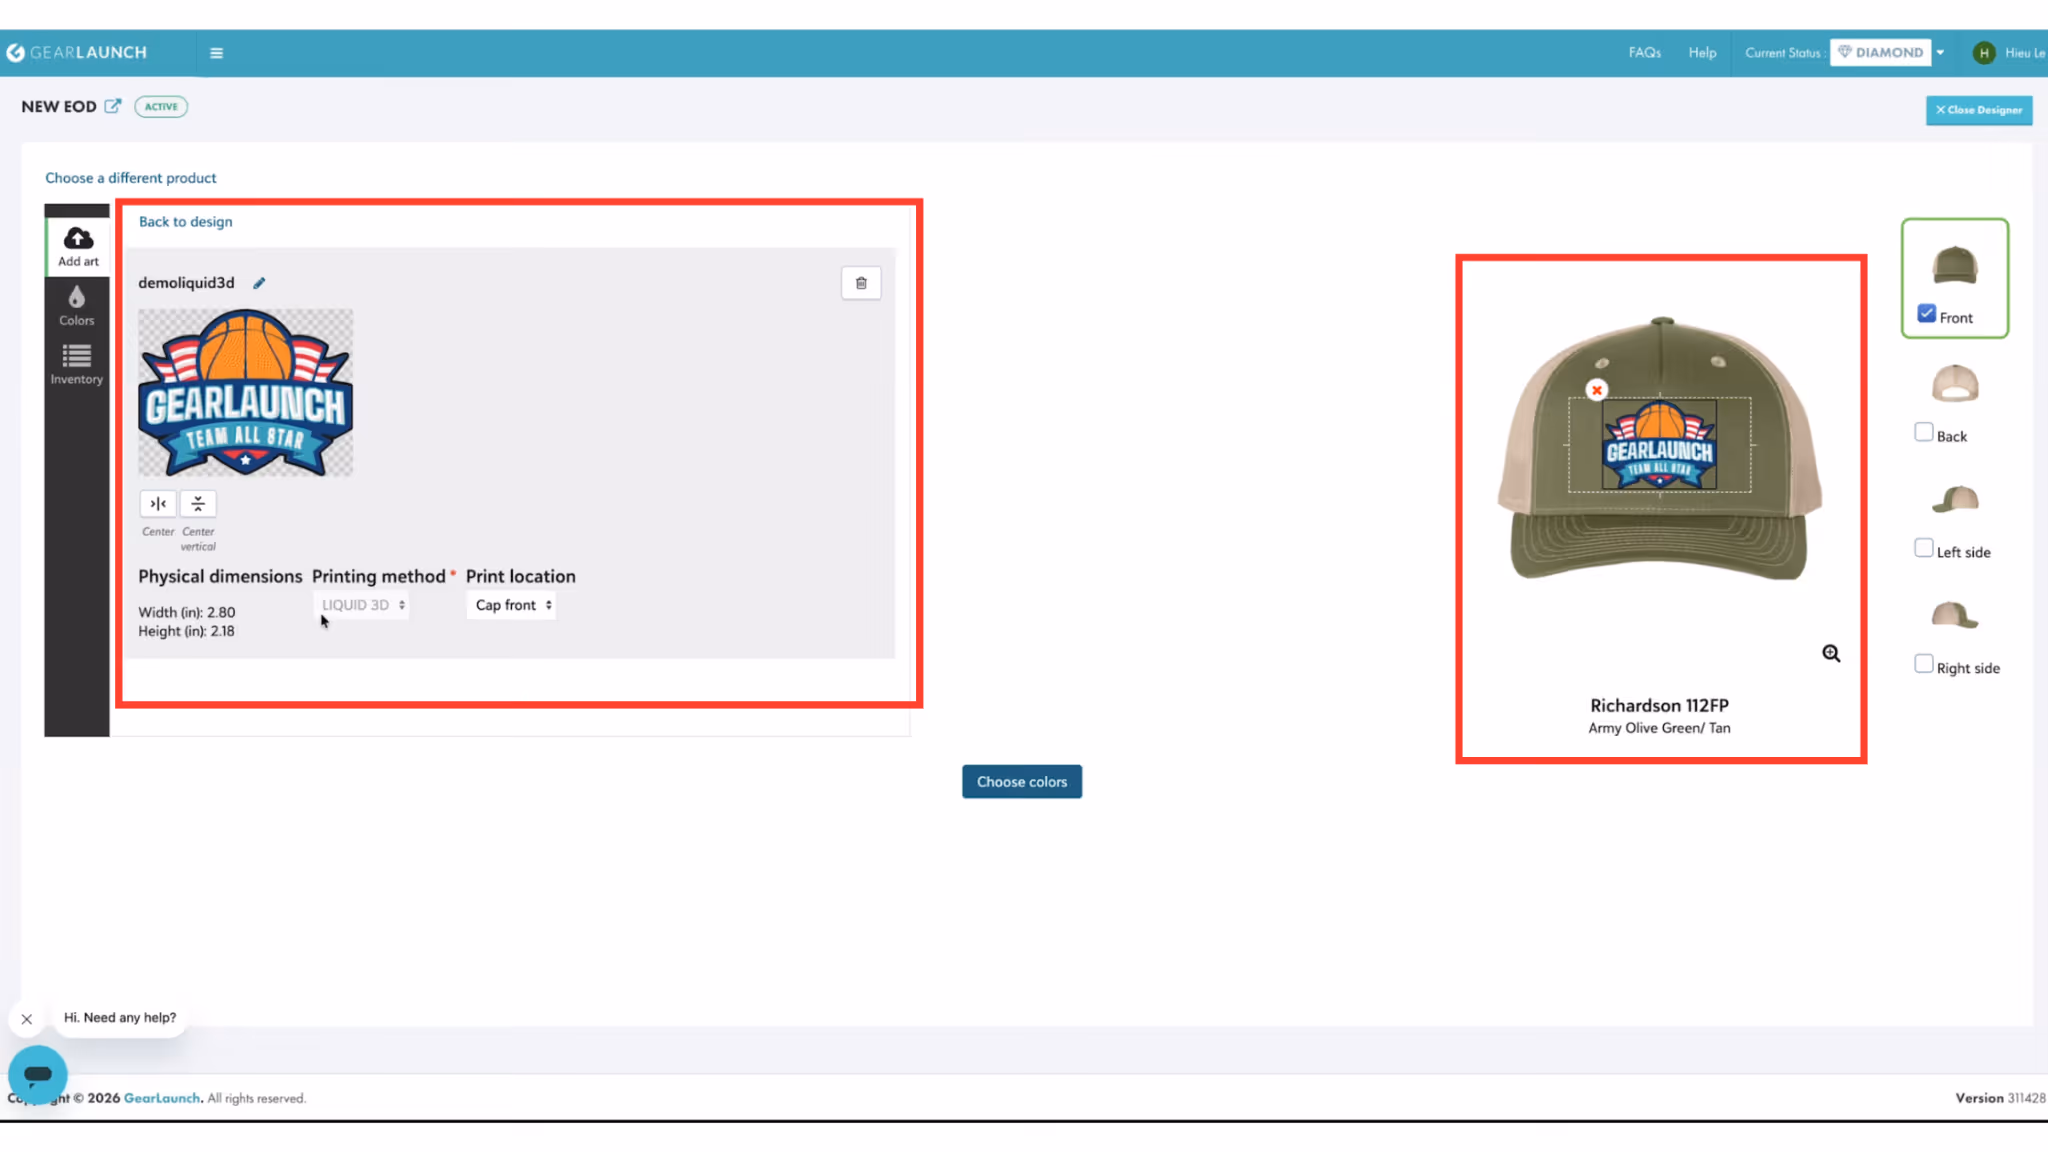
Step 4 (Customize 3D Effects): Use the right-side panel to adjust the Fabric Color, Elevation (Thickness), Edge, and Textures of your design. Once you are happy with the preview, you must click Save and Close to lock in your 3D settings.
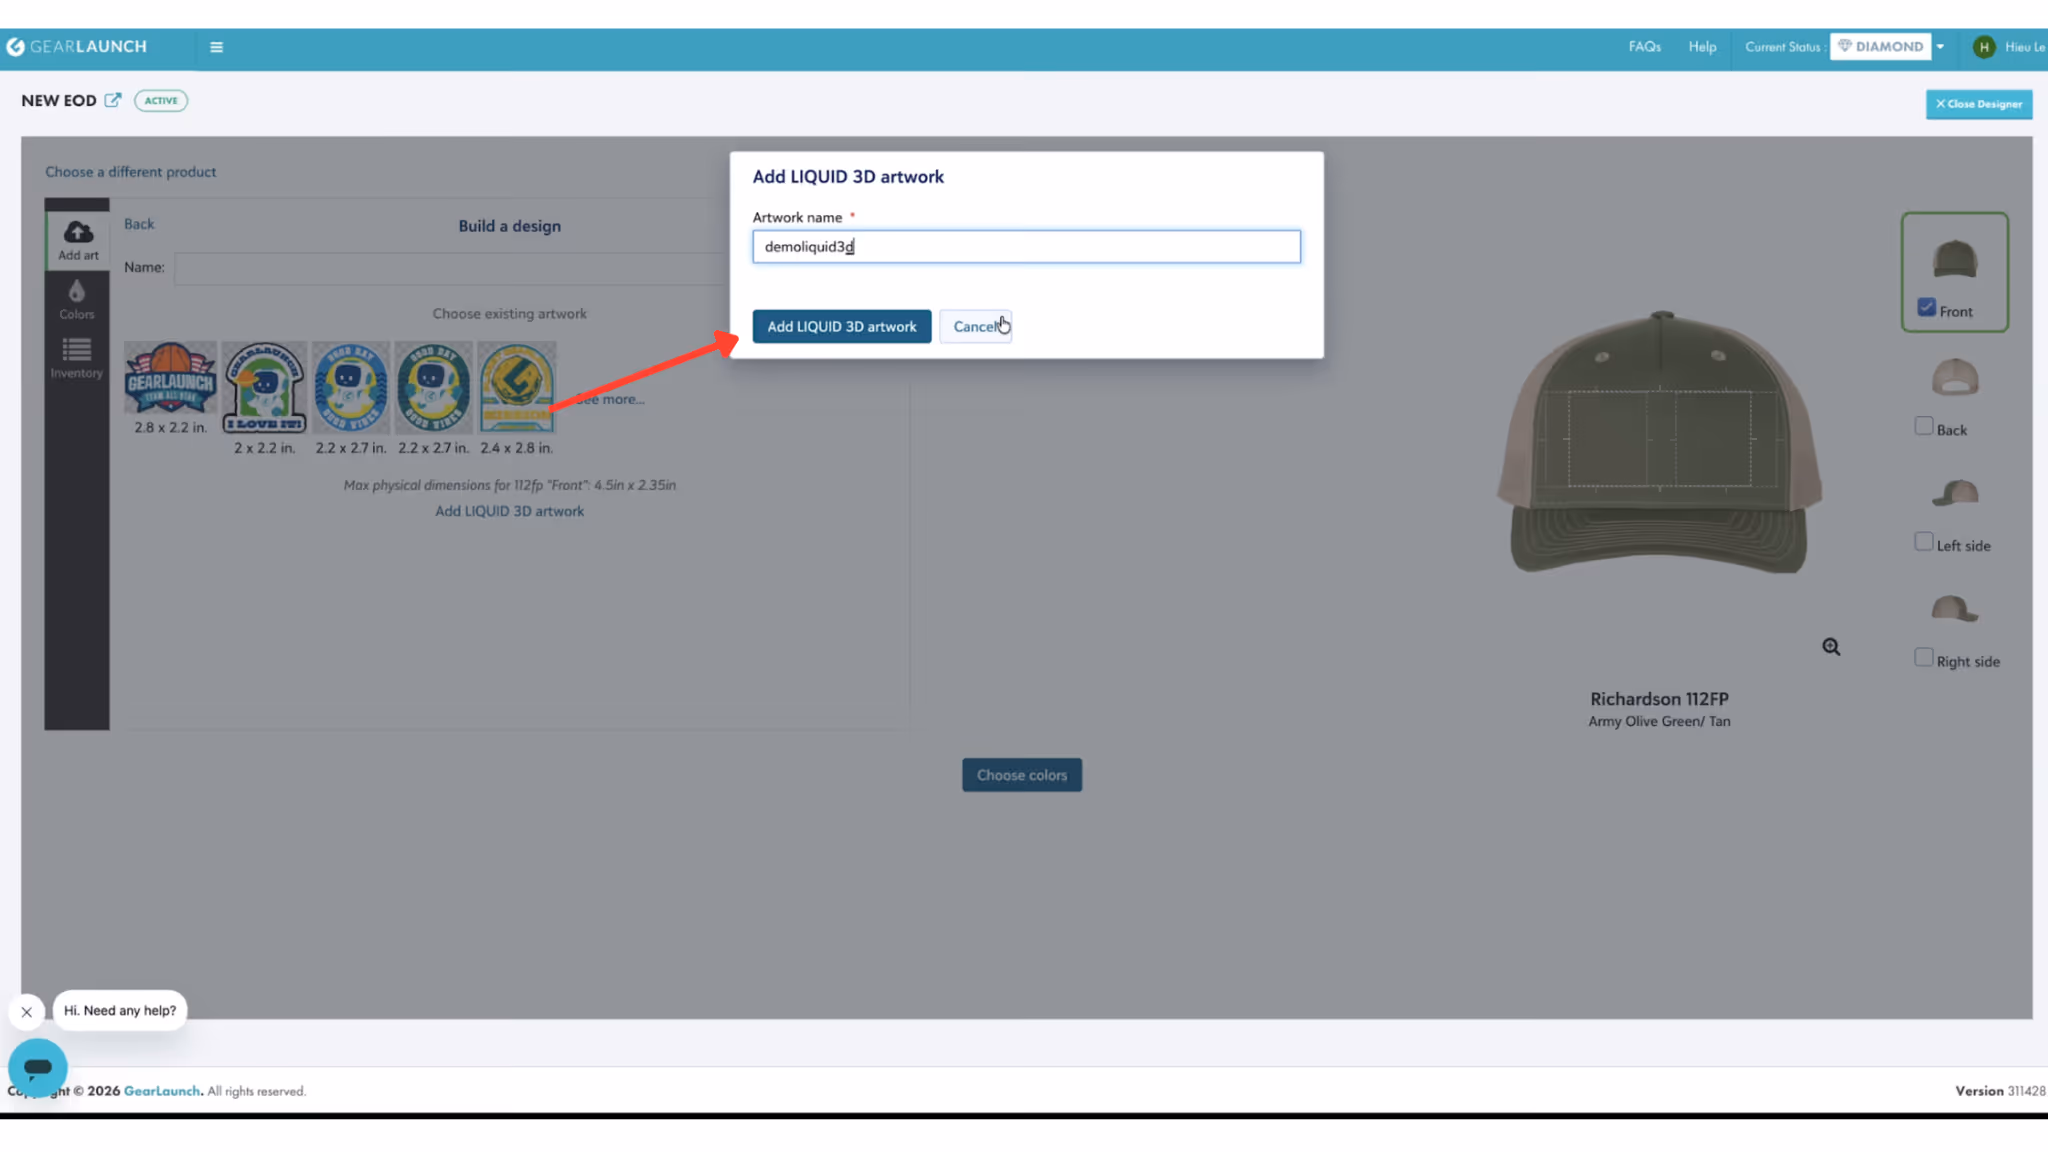
Step 5: Name your LIQUID 3D artwork and add it to the product.
Design Best Practices: For the best results, completely avoid special effects like drop shadows, glows, or grain.
Laser engraving is the perfect choice for a sleek, classic aesthetic and is incredibly easy to use.
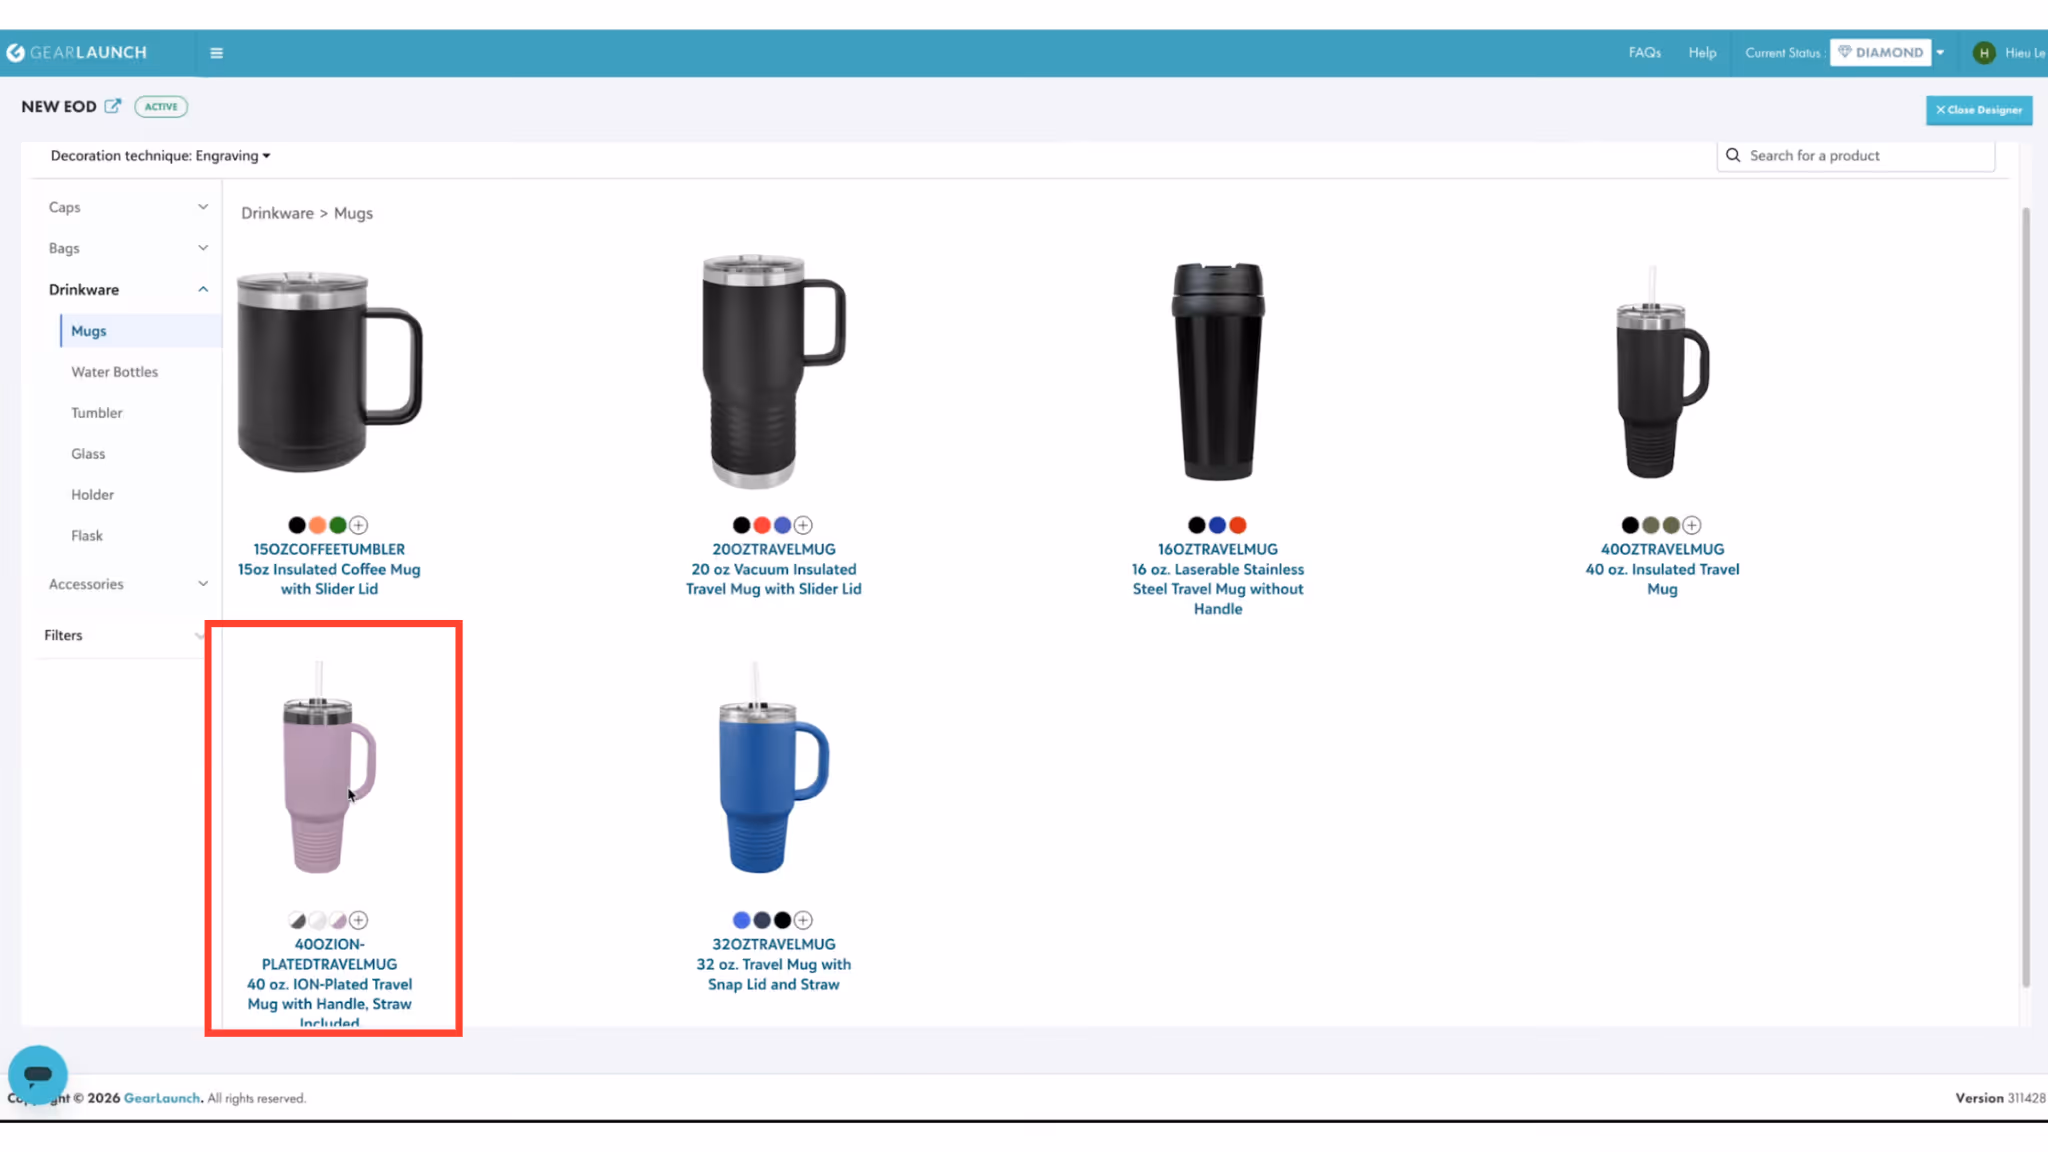
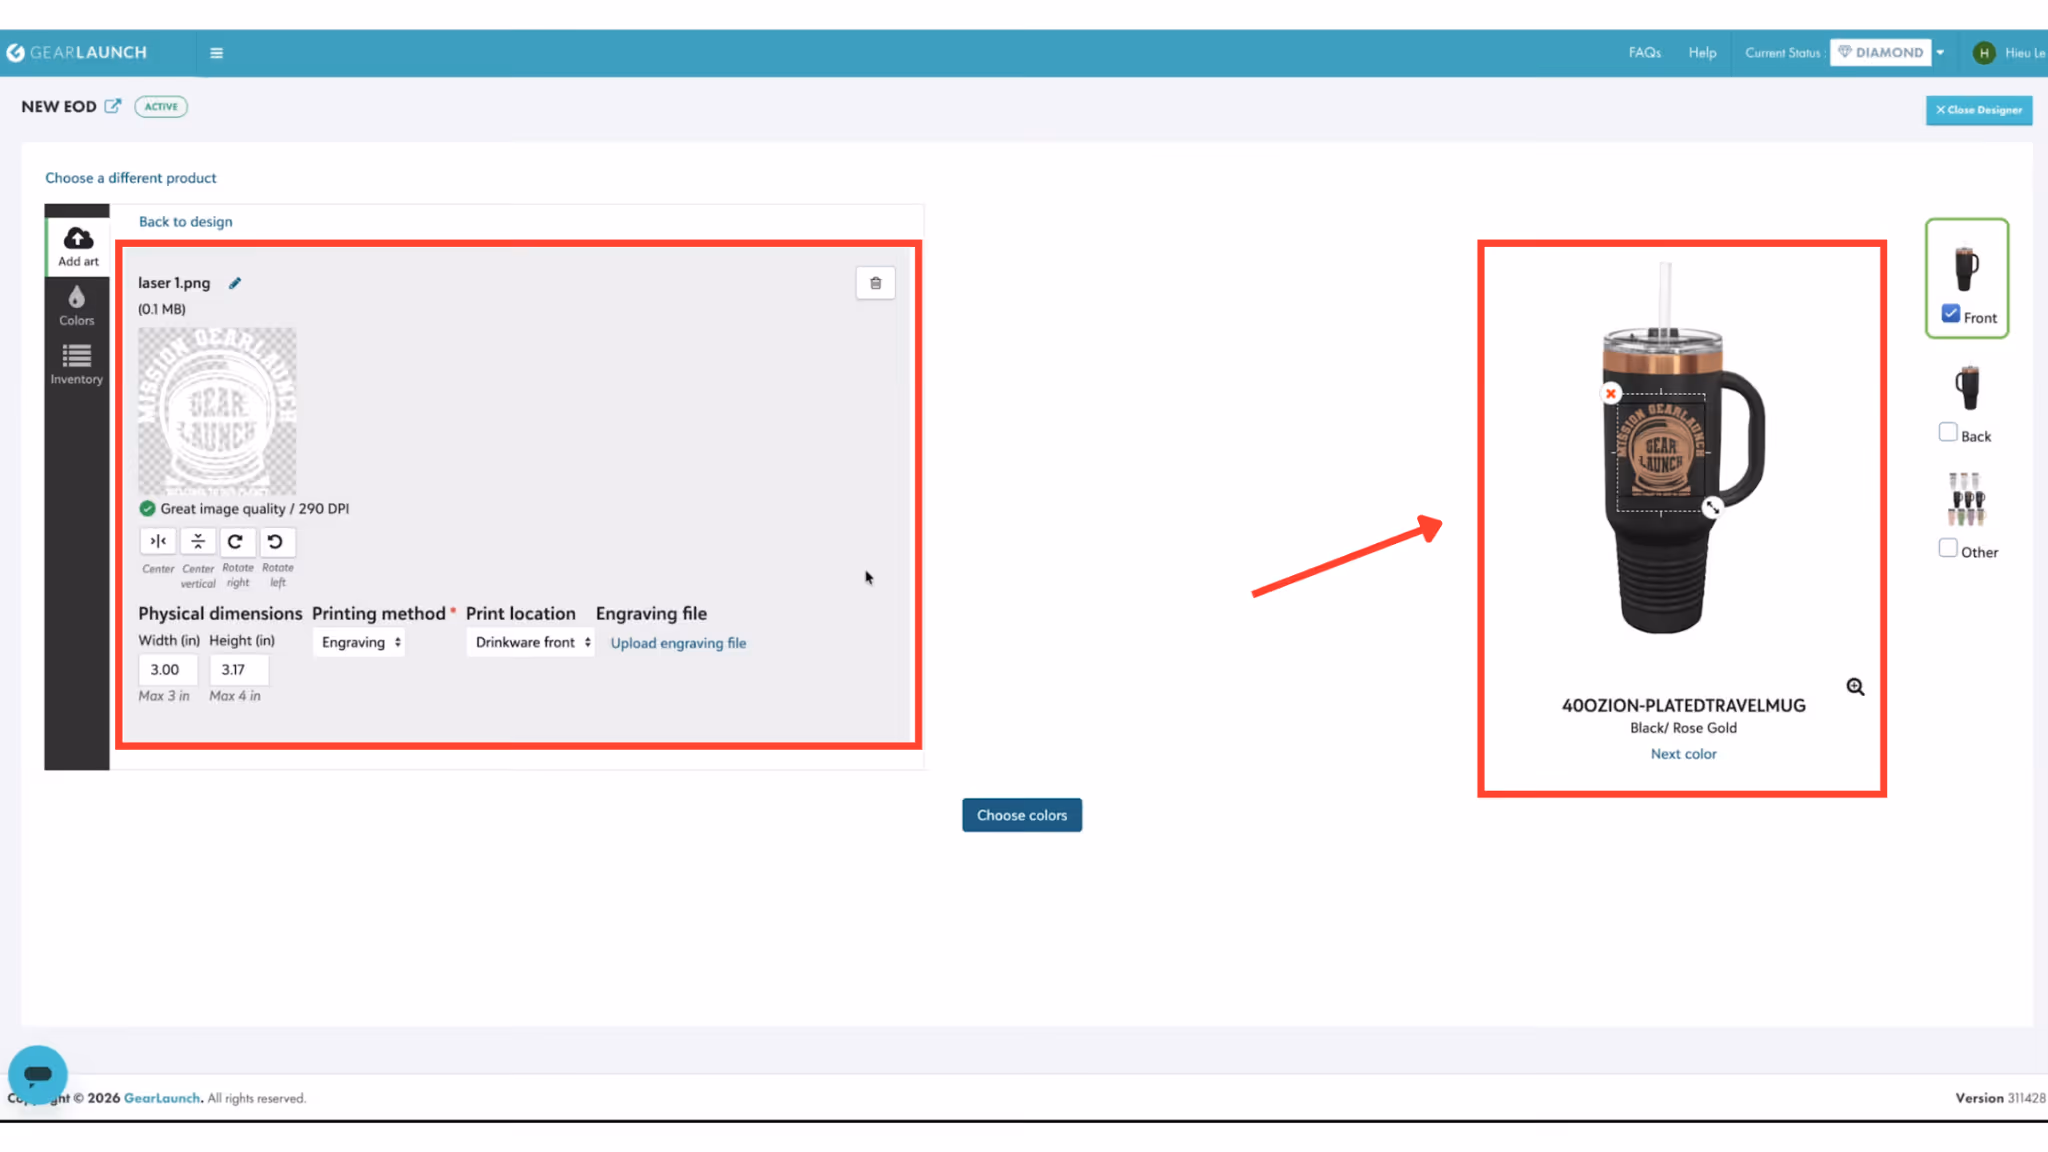
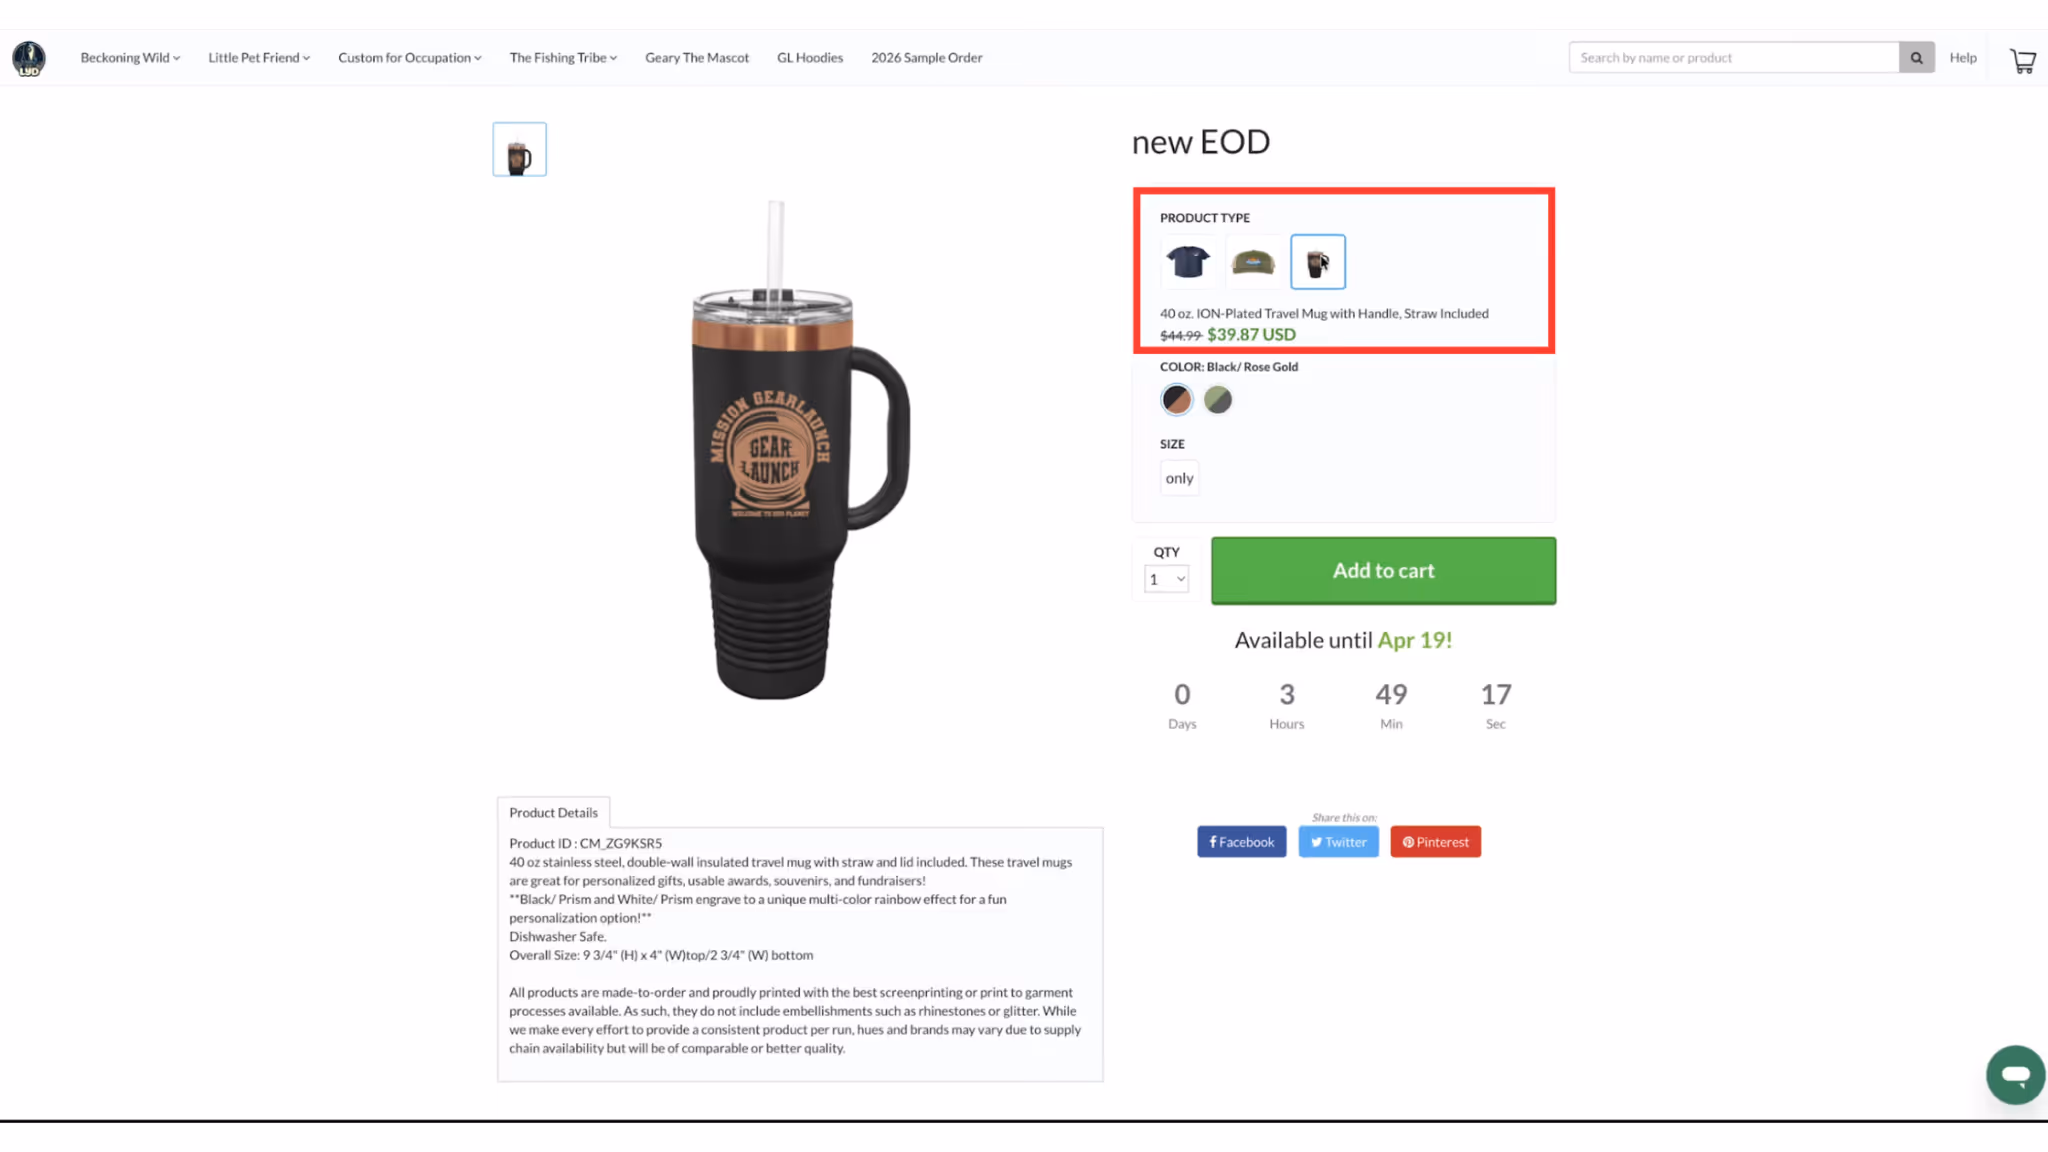
Step 1: Select a compatible product from the menu, such as Drinkware > Mugs.
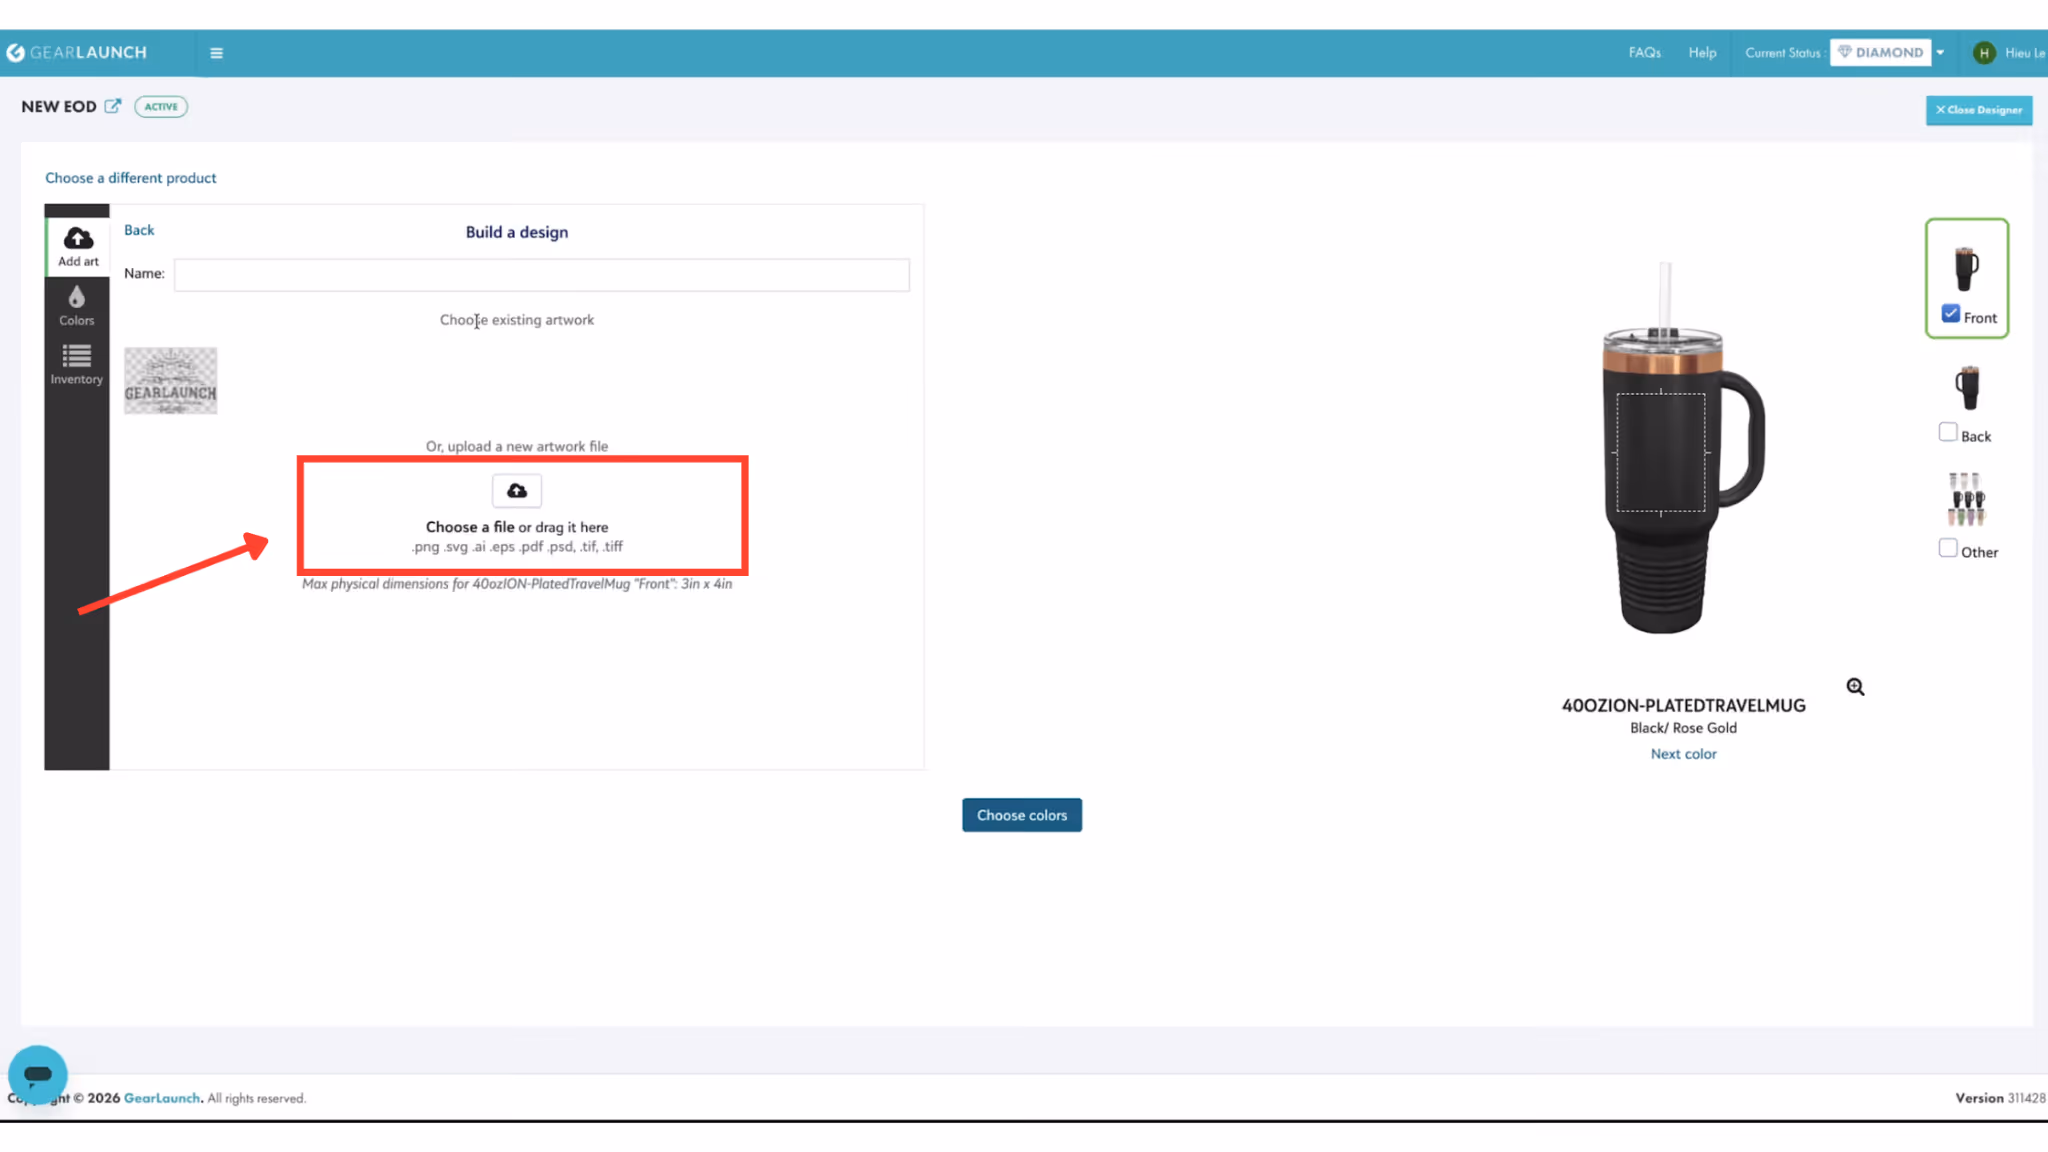
Step 2 (Upload Process): Click to choose a file or drag it directly onto the dashboard. You can upload a simple .png image, or use vector formats like .eps, .pdf, or .ai. (The system also accepts .svg, .psd, .tif, and .tiff).
Step 3: The printing method will automatically set to Engraving. Check your mockup preview!
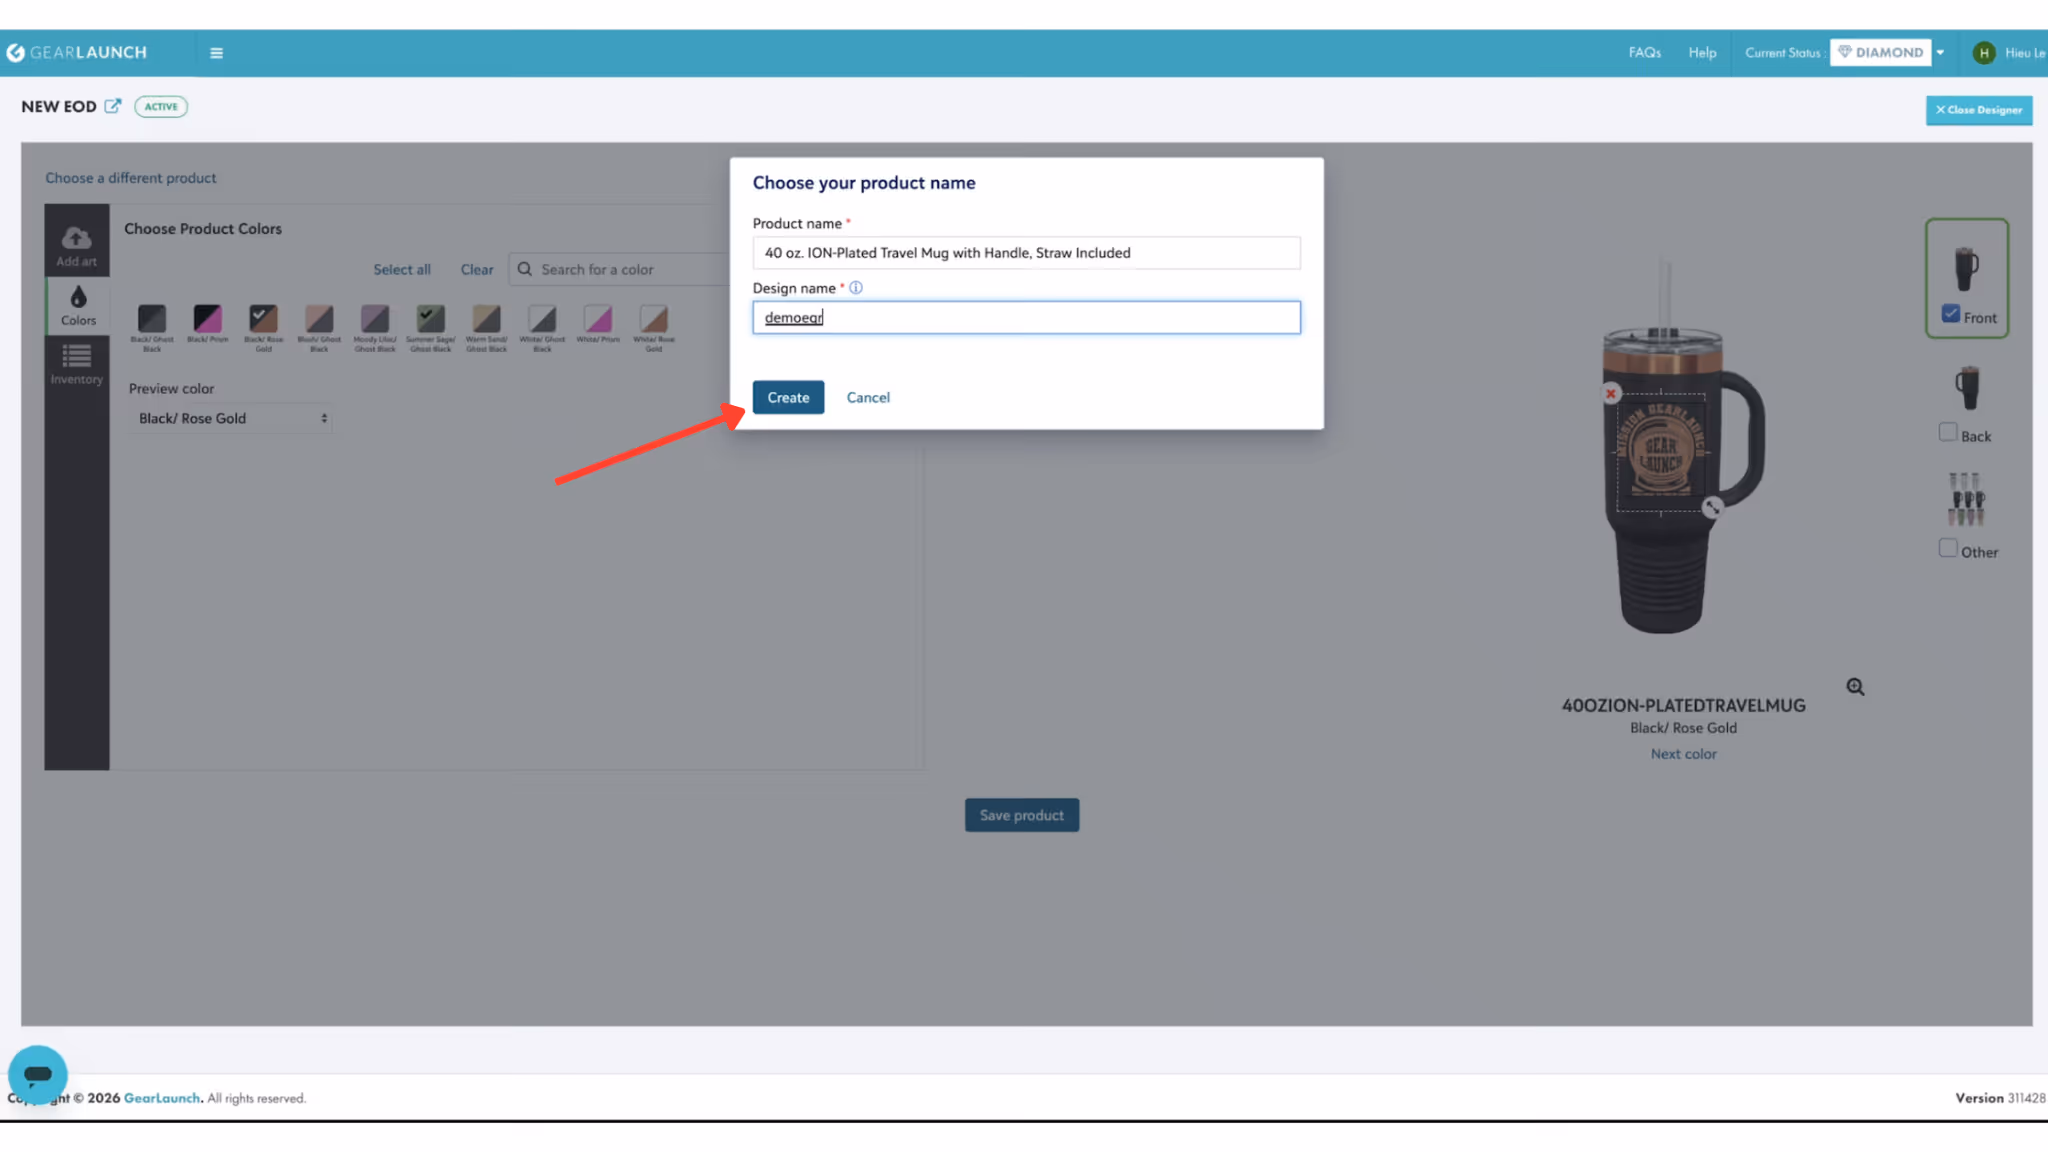
Step 4 (Save Product): Click the Save product button. A window will pop up asking for your Product name and Design name. Fill these out and click Create
Design Best Practices: To ensure a crisp engrave, completely avoid drop shadows and lighting effects in your artwork.
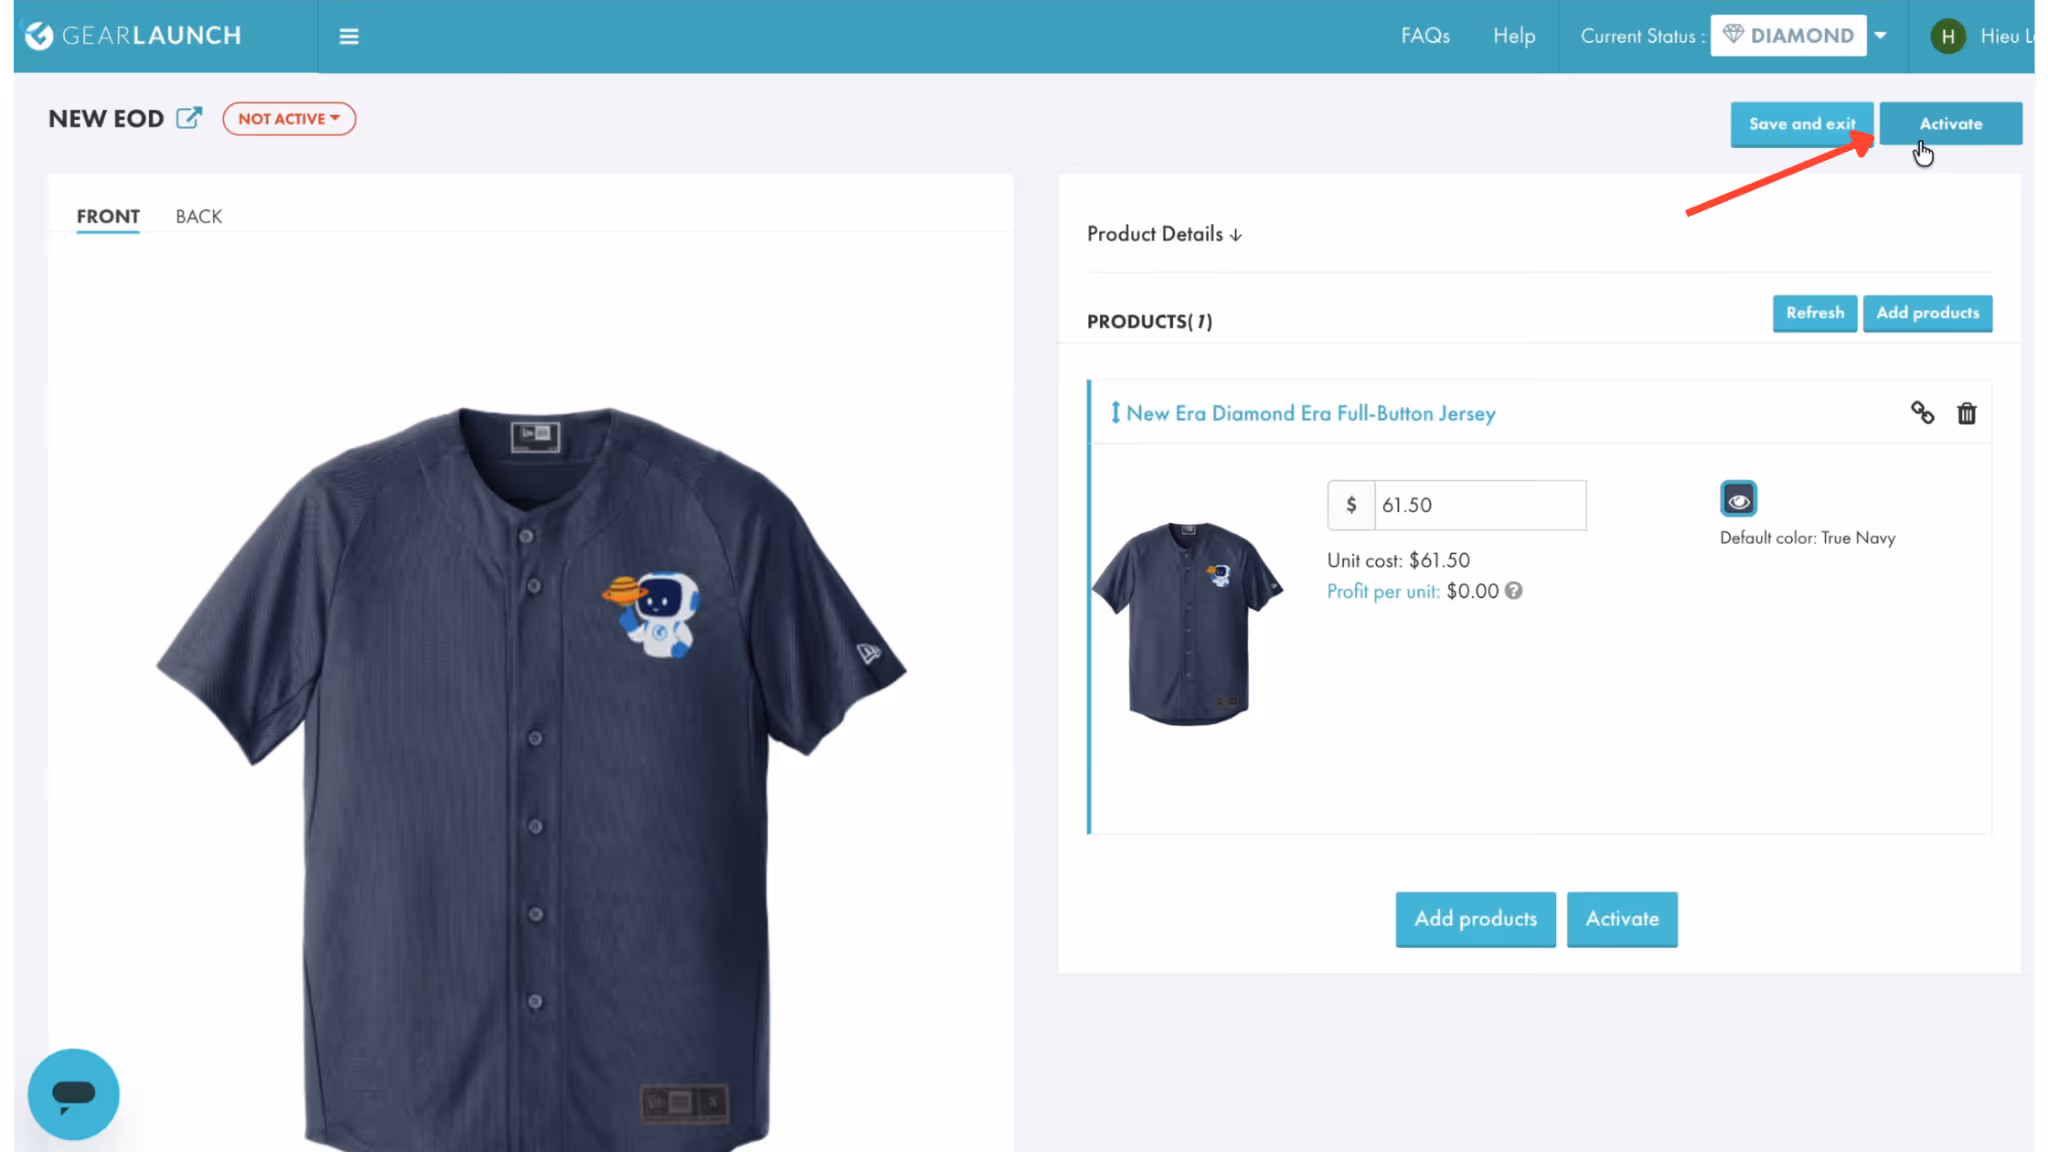
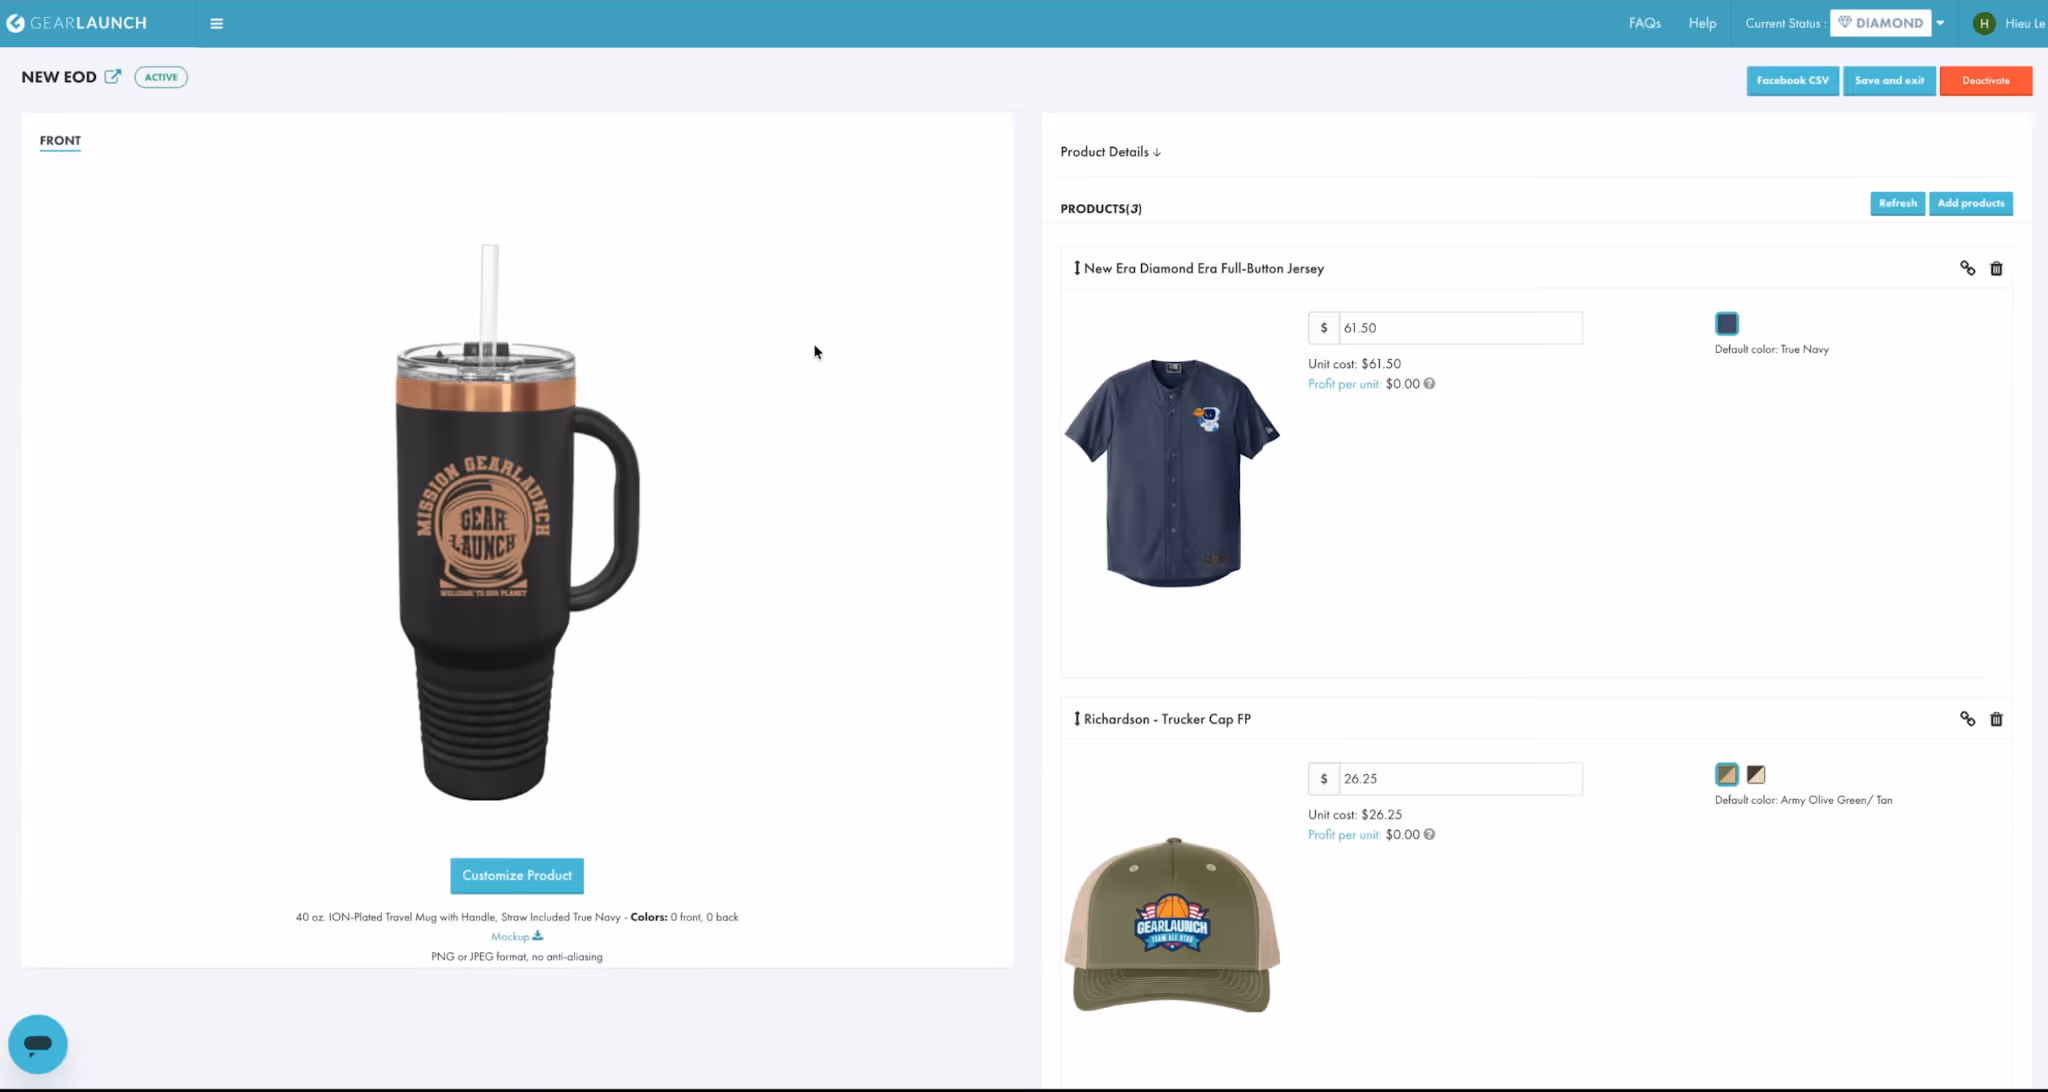
Once you have added all your desired products and methods, review your product details on the final screen. When you are ready, simply click the Activate button in the top right corner to make your campaign live.
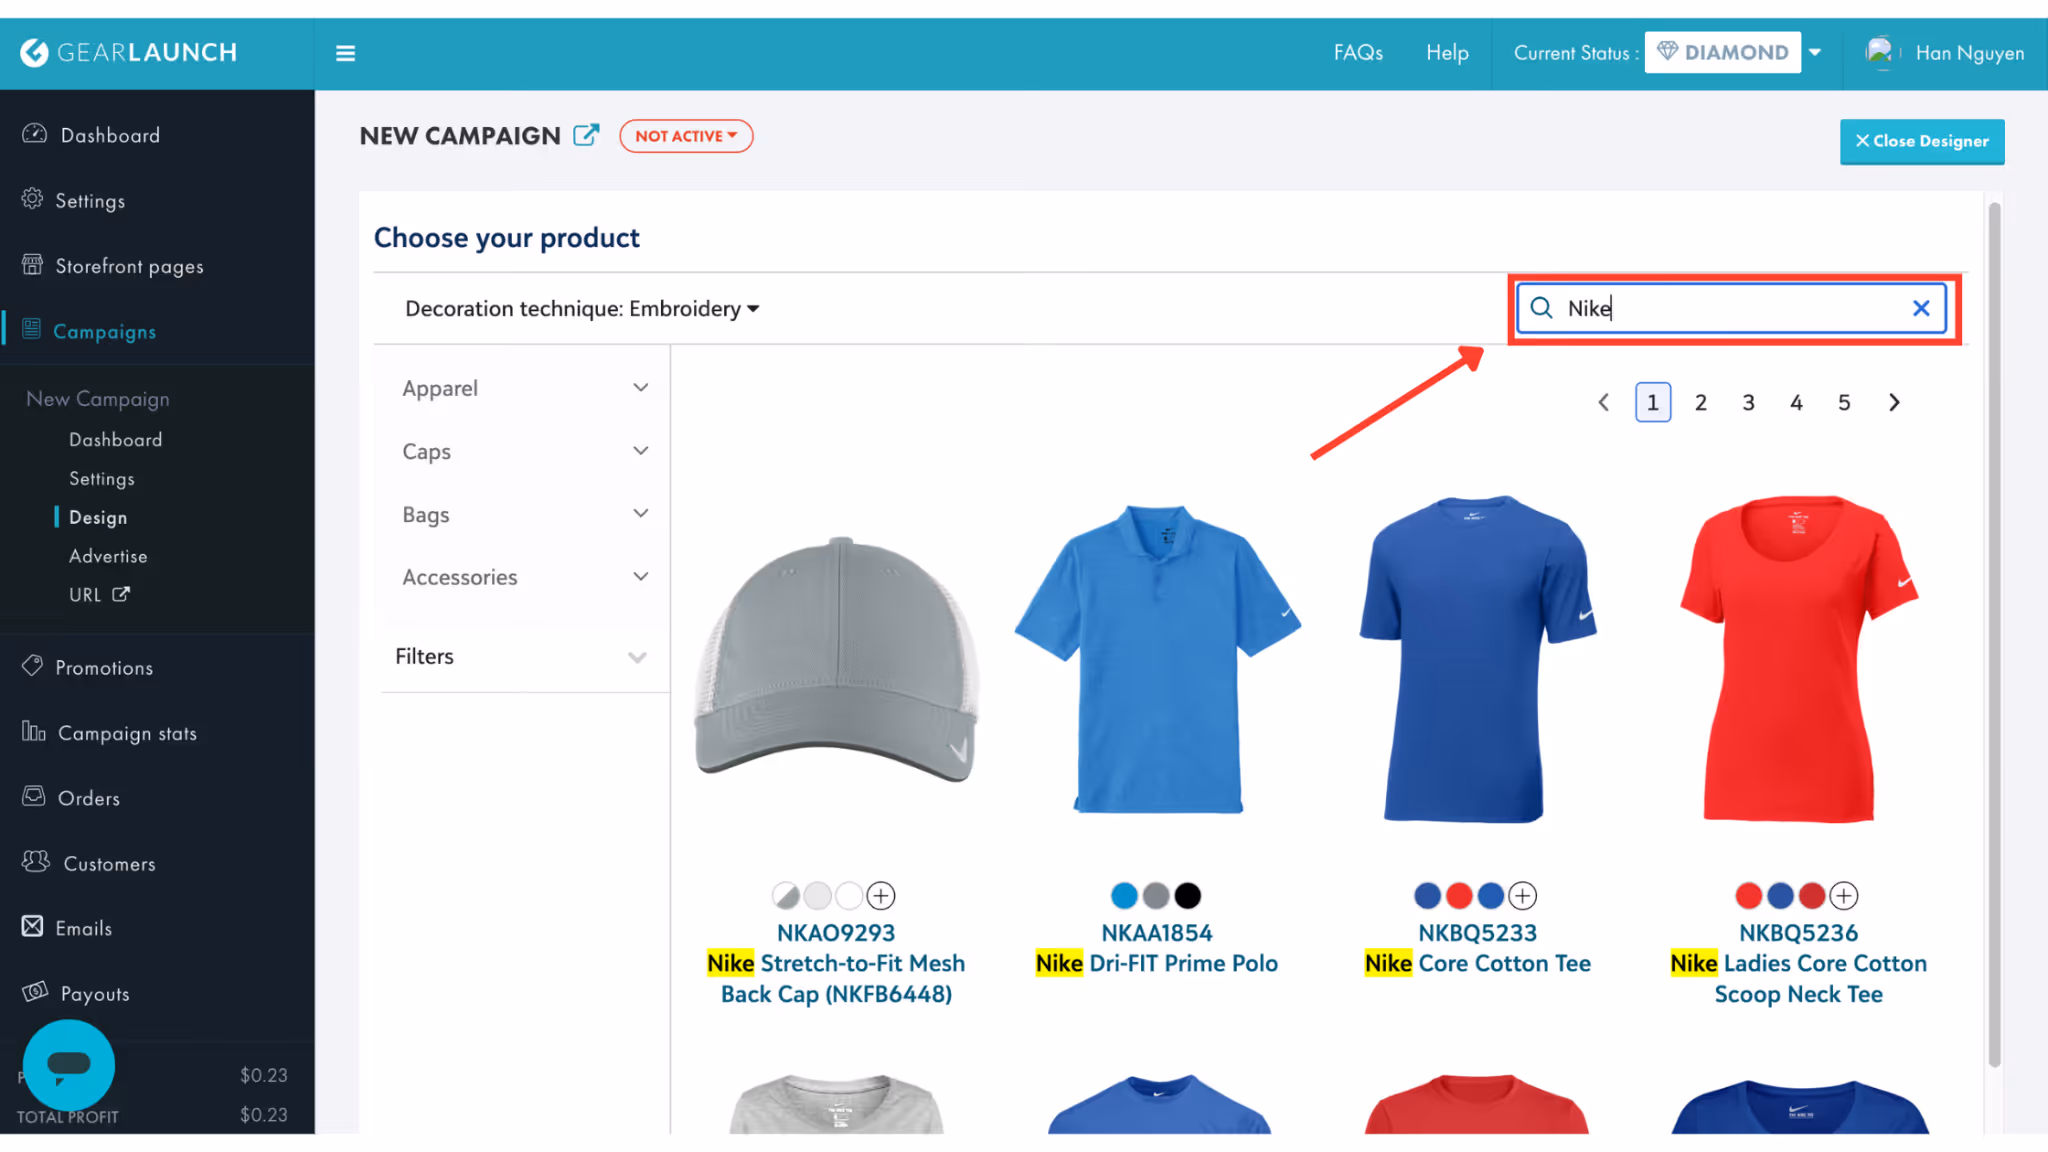
You can easily use high-quality blank apparel made by top brands such as Nike and Adidas directly in your seller dashboard to elevate your storefront.
⚠️ Important Trademark Rule: Even though you can sell on these premium blanks, you cannot upload artwork containing branded images or trademarks (such as the Nike logo). Please ensure all your uploaded designs are completely original!
Double-check your dimensions, prep your files, and start building the next generation of your brand today!Want to learn more advanced tips? Stay tuned for an upcoming free course from GearLaunch covering all technical specifications and file design secrets for these new methods!


.svg)
.svg)
.svg)